Adapt an UE project to Parrot Sphinx#
To be able to use your project with Parrot Sphinx, you must adapt the 3D environment and the project settings.
Running Unreal Engine Editor#
Once the editor is built and installed, you can start creating or editing an Unreal Engine project.
To create a new project, just start the editor and follow the instructions:
$ /opt/parrot-ue4-editor/Engine/Binaries/Linux/UE4Editor
To open an existing project:
$ /opt/parrot-ue4-editor/Engine/Binaries/Linux/UE4Editor </absolute/path/to/project.uproject>
Renaming levels [mandatory]#
All levels belonging to the projects should follow the rules below.
A level name should be written following the snake_case convention. No capital letter is allowed.
There must always be a level named
main.The
mainlevel should be the project default map. You need to set it in your project settings.
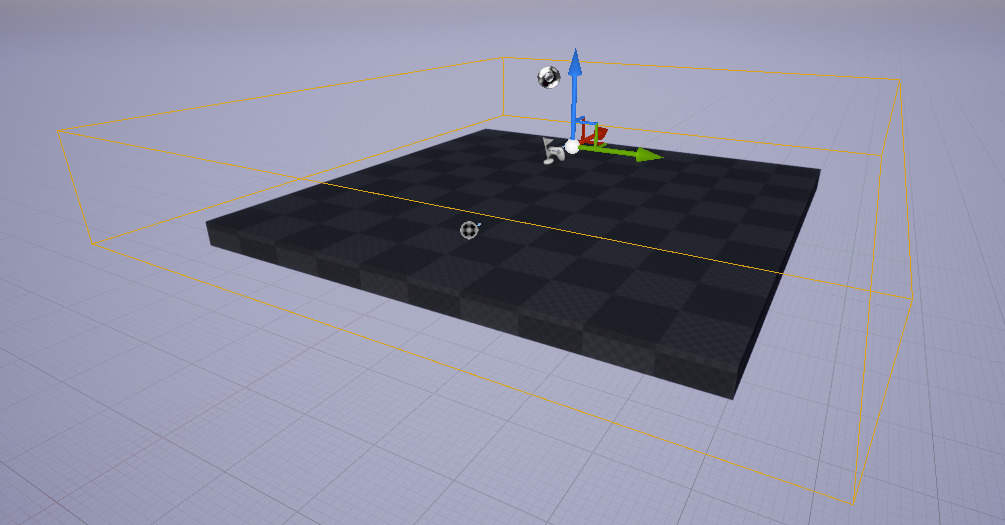
Adding spawn points [mandatory]#
The world requires at least one spawn point (or TargetPoint, in Unreal
vocable). One of the created TargetPoints must be named default.
TargetPoints are actors used to specify where the drone will be spawned
when the simulation starts. Before creating any new spawn point make
sure you delete all the existing ones, to avoid sending false information
to Parrot Sphinx.
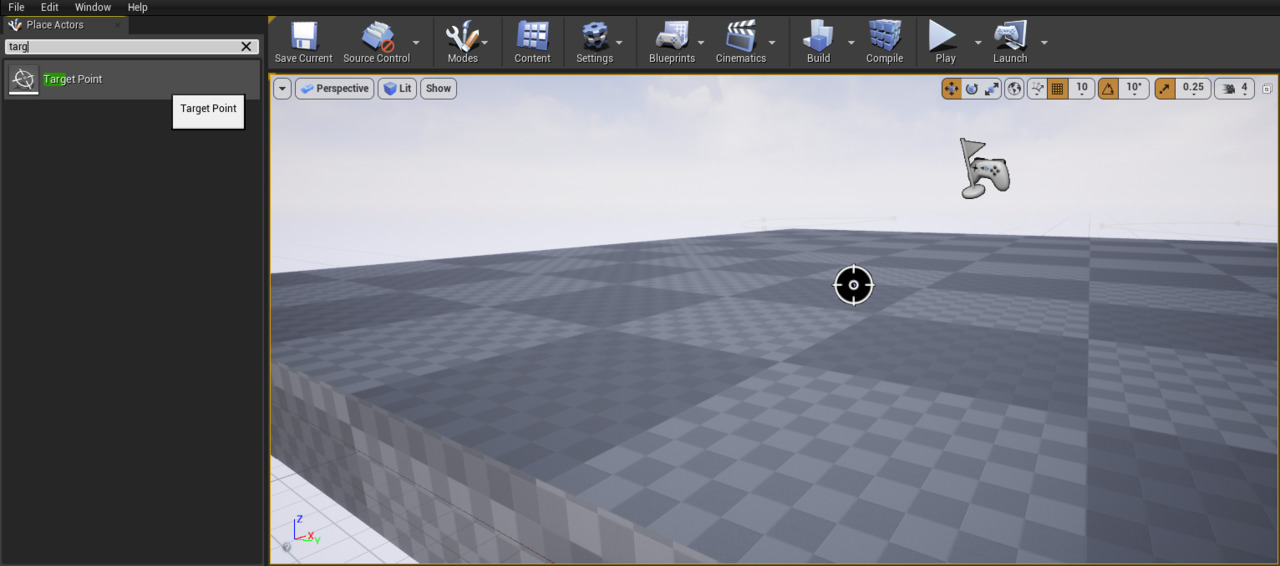
To create a spawn point, go in the left panel, tab Place. Select All
Classes and search for TargetPoint. To add one spawn point you
should drag and drop it from the Place Actors panel to the desired location.
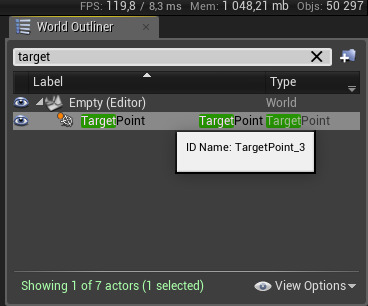
Once your spawn point is added to the world and you want to change its
name, just select it in the World Outliner panel and rename it.
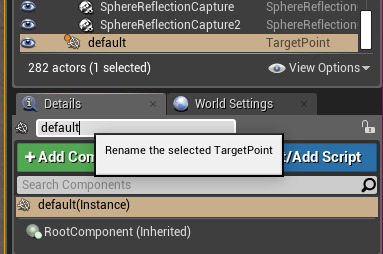
Note that the name that will be used by Parrot Sphinx is not the one shown in the panel but the one displayed when you hover with your mouse over it, the ID Name, and normally the editor name and the ID Name are the same but you should pay attention to that.
Finally, you need to adjust the spawn point height to 20 centimeters above the floor so the drone can be dropped smoothly with no damage.
Adding Parrot Sky [mandatory]#
The Parrot Sky is a Blueprint Actor that simulates the sky. It must be added in
the scene to apply adjustments to the exposure range and add several runtime
parameters controlling lights, shadows. To do that, you need to enable the
Show Engine Content parameter in the Content Browser.
Once enabled, go to the folder named Parrot under the Engine Content,
you will find an object named BP_ParrotSky in the Sky folder.
Drag and drop that object into your world.
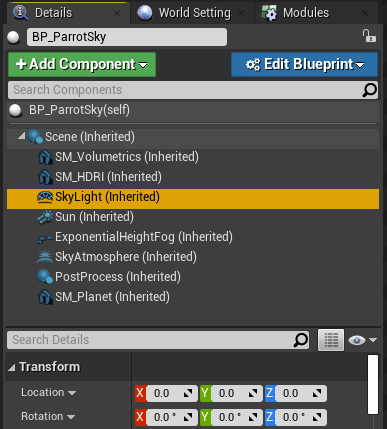
The Parrot Sky BP_ParrotSky is a Blueprint Actor that contains the following components:
SM_Volumetrics: A Static Mesh Component used to simulate clouds.
SM_HDRI: A Static Mesh Component used to simulate a High Dynamic Range (HDR) image as a backdrop.
SkyLight: A Sky Light Component to capture the distant parts of the level and applies it to the scene as light.
Sun: A Movable Directional Light Component that represents the Sun.
ExponentialHeightFog: An Exponential Height Fog Component to compute a height-based fog.
SkyAtmosphere: A Sky Atmosphere Component to create an Earth-like atmosphere that gives an approximation of light scattering through a planetary atmosphere’s participating media.
PostProcess: A Post Process Component to tweak the look and feel of the scene.
If your scene already contains a Sky Light, an Exponential Height Fog, or a Sky Atmosphere component, they must be deleted from the scene. If you want to preserve the look and feel of the original scene, you can copy their parameter values to the corresponding components in the Parrot Sky instance.
If your scene already contains Post Process Volumes, you have to make sure that their priority is lower than the priority of the Post Process Component in the Parrot Sky instance.
Note
This topic uses the term “dynamic sky” to refer to a sky computed by the Parrot Sky that can be configured at runtime. In particular, the “dynamic sky” contains a Movable Directional Light Actor to represent the Sun. This Actor can be moved to simulate a day-night cycle. The term “static sky” refers to a sky computed from a Stationary Directional Light Actor and a BP_Sky_Sphere Actor. These Actors are added manually and are not part of the Parrot Sky. A BP_Sky_Sphere Actor is basically a Sphere Mesh Actor with a sky texture applied on the inside. Stationary lights can change in some ways during runtime, such as having their color changed or their intensity changed, but not move. They will use a Cached Shadow Map to reuse for the next frame when the light is not moving, which can improve performance for projects using dynamic lighting. They are recommended to improve performance on low-end workstations.
The Parrot Sky contains three public member variables that can be manipulated in the editor:
BaseLocation: This vector must be set to the desired location of the Parrot Sky in centimeters. A good candidate value is the location of the “default” spawn point. By default, this parameter value is set to [0, 0, 0].
bUseDynamicSky: Setting this boolean to false disables the components of the Parrot Sky that work with movable lights, and enables Actors in the Map that have been designated as part of the “static sky”. By default, this parameter value is set to true.
bUseHdri: Setting this boolean to true configures the Parrot Sky to use an HDR image as a backdrop instead of Volumetric Clouds. By default, this parameter value is set to false.
Preset: This string defines the default preset to use for this Map. By default, this parameter value is set to “daylight_clearsky”.
It also contains two public member variables to designate the Actors in the Map that represent the “static sky”:
StaticSun: A reference to a Directional Light Actor that usually represents the Sun. By default, this parameter is set to None.
SkySphere: A reference to a BP_Parrot_Sky_Sphere Actor. By default, this parameter is set to None.
It is up to you to decide if a “static sky” should exist in the map. If your map contains static lights, do not forget to build the lighting.
Warning
The Parrot Sky does not use a common range for exposure parameters, so you may have to boost the intensity for all the lights in your map in order to preserve its original look and feel. In practice, you may have to multiply by ~500 the intensity of all your lights. If your map contains emissive materials, it is recommended to divide the final emissive color by the EyeAdaption node to keep the materials emissive consistent across different exposure levels.
Warning
If your scene is indoor, it is highly recommended to set the Preset property of the Parrot Sky to “indoor”.
Warning
Your project MUST be free from any static light since the option
Allow Static Lighting needs to be set to false (go to Project settings).
Customization#
The sky contains two background modes: “Volumetric clouds” and “HDRI”.
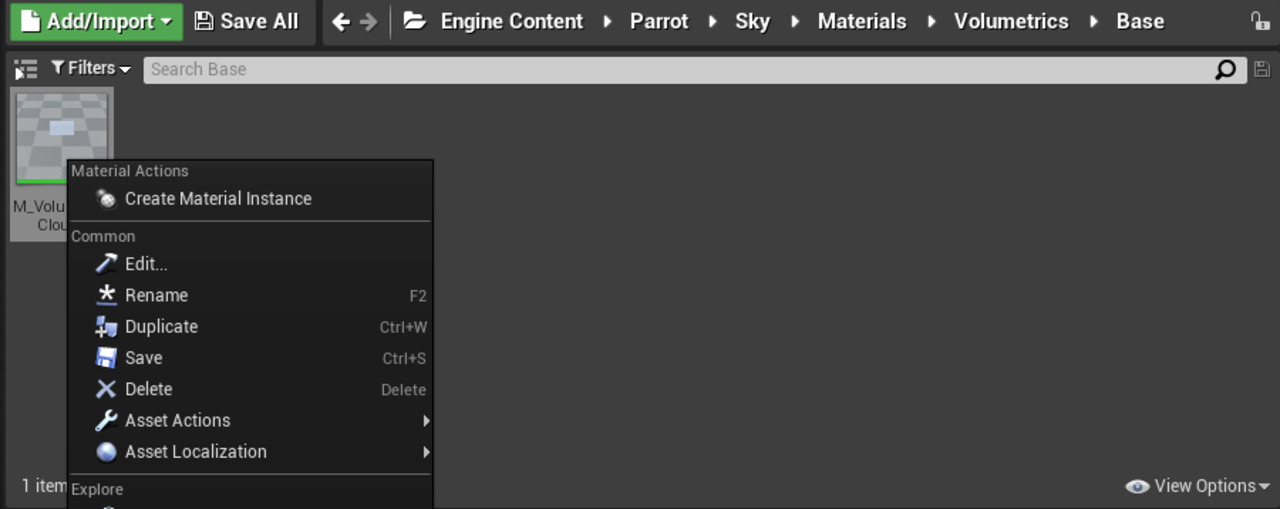
To adjust “Volumetric clouds” mode, you need to edit the
material of the volumetric mesh. To do so, you need to create
a material instance from the parent material under
Engine/Content/Parrot/Sky/Materials/Volumetrics/Base/M_VolumetricClouds.
To create the instance, you need to right click on the material and select
Create Material Instance.
Once the instance is created, you need to assign it as material for the instance of Parrot Sky placed in the world.
Note
Please make sure that you are editing the instance of ParrotSky not the original Blueprint in the engine.
Now, when the material is set to the mesh, you can open the instance and edit it to create you custom volumetric material.
Note
Make sure you move the instance from the engine folder to main project folder.
To adjust “HDRIs” parameters, proceed the same way, but the material is found
under Engine/Content/Parrot/Sky/Materials/HDRI/M_PanoramaSky.
Note that some of the parameters you can adjust in the editor can also be
manipulated at runtime in the Web dashboard or with sphinx-cli.
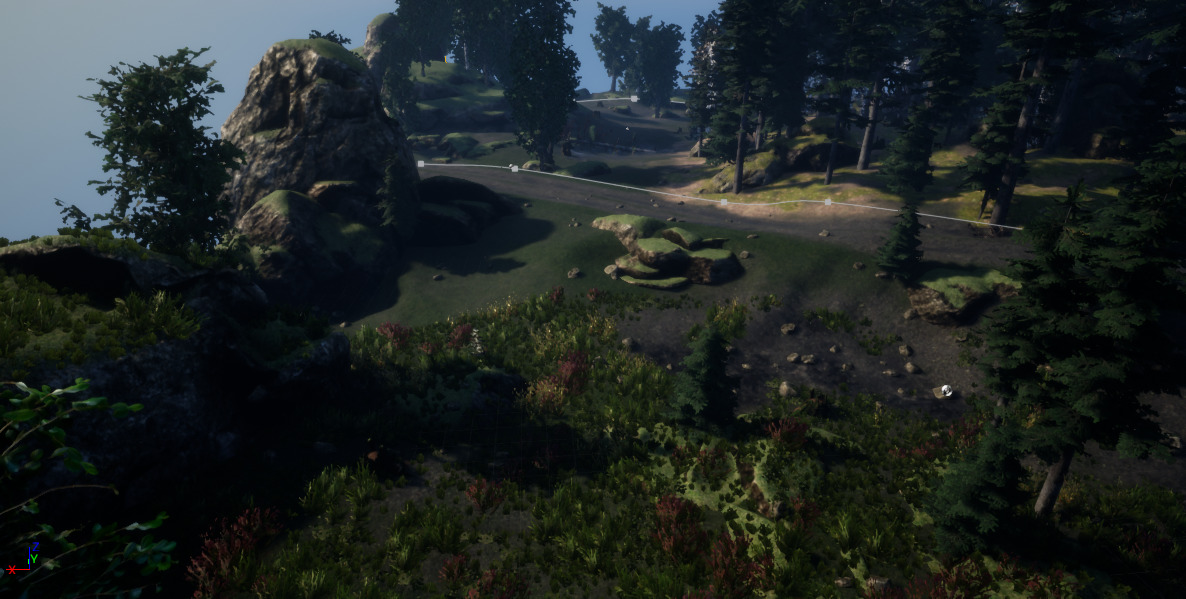
Adding AMS paths#
Here, this part shows how to create a predefined path that pedestrians and vehicles will be able to follow.
First of all, you need to enable the Engine contents, the same as with
the sky, and then add the actor named SplineDef to the desired location.
Then, Select the SplineDef actor in the content browser and drag and
drop it in the desired location in the 3D scene.
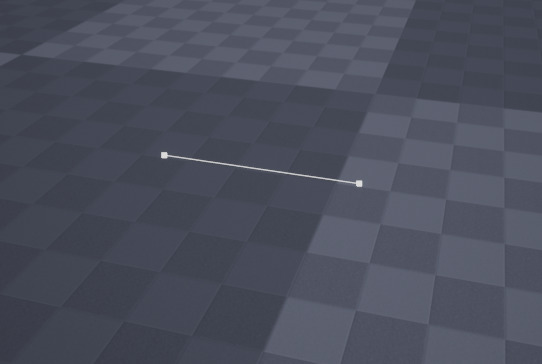
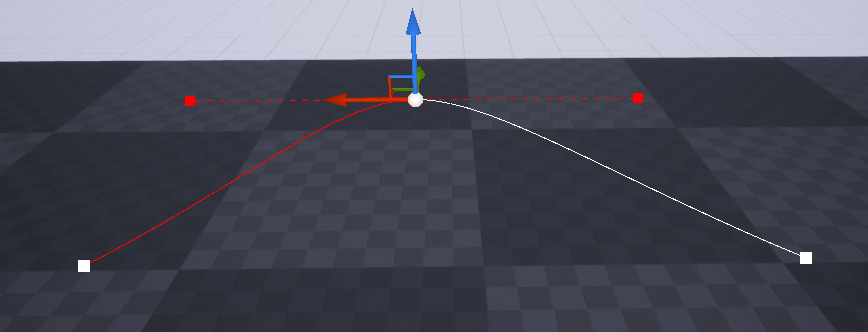
The default path is defined by two waypoints forming a spline. But you can add as many waypoints as you want, and you can make your path as long as you desire.
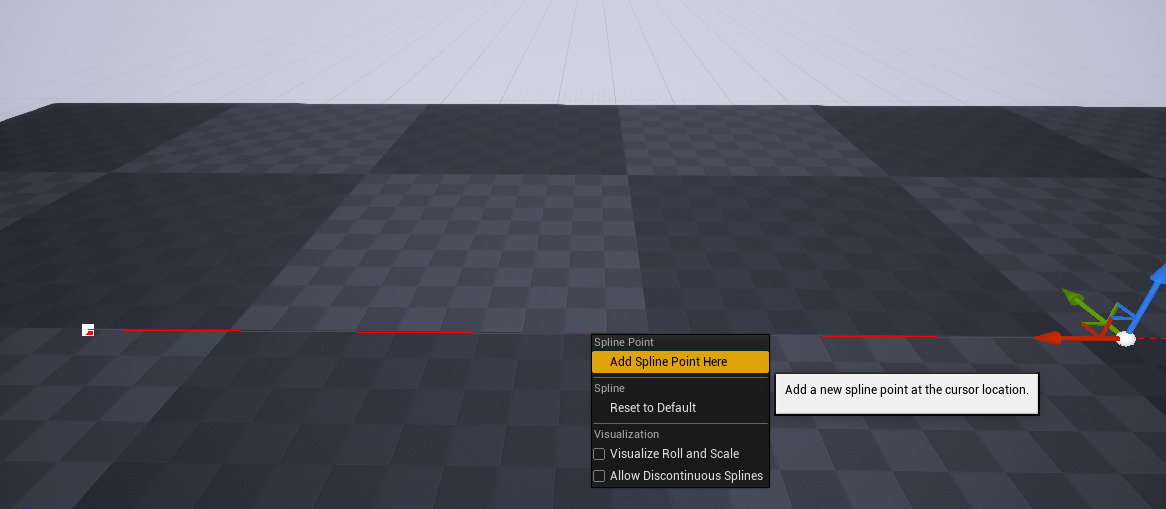
To add a waypoint, you need to right-click on the spline where you want to
add it and select Add Spline Point Here.
You can change a single waypoint location by selecting it and translating it where you desire.
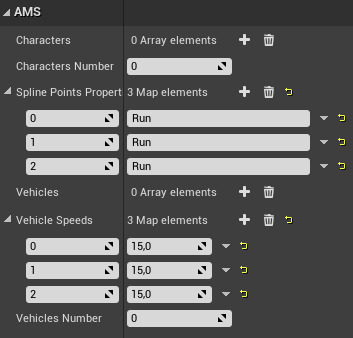
Some properties can be adjusted for each path, such as:
Whether the path is a closed loop or not.
The pedestrian behavior beyond the related waypoint.
The vehicle speed beyond the related waypoint.
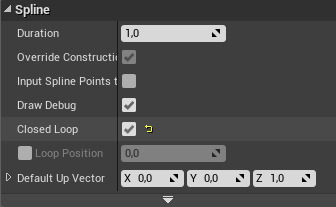
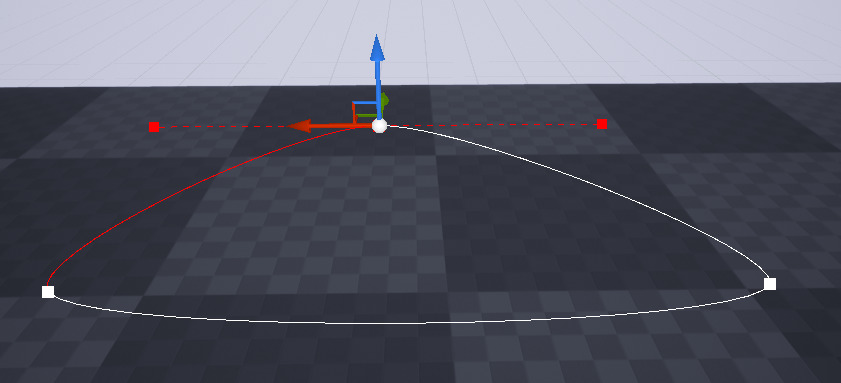
You can choose whether your path is a closed loop or not by selecting
the Spline Component of your path in the “details” panel, then in the
Spline Tab, you can check the Closed Loop option to make a closed-loop path.
|
=> |
|
Besides, you can choose the pedestrian behavior, beyond the related waypoint, by editing the behavior parameter in the path properties.
You can choose one of these behaviors:
Walk, the default behaviorRunStop
Also, you can choose the vehicle speed in km/h, beyond the related waypoint, by editing the vehicle speed parameter in the path properties.
The default speed is 15 km/h and the max speed is 150 km/h.
Adding Areas#
Areas are 3D volumes that do not physically exist in the world but can be requested via the web dashboard.
Areas are represented by Trigger Volume actors. Trigger Volumes can be created by selecting the Trigger Volume type from the Volumes tab on the Place Actors panel and dragging and dropping it into the level viewport.
In Unreal Engine, Trigger Volumes are Actors that are used to cause an event to occur when they are interacted with by some other object in the world. For example, the light is turned on when a persons enters a room. Entering the room for Unreal Engine is overlapping with the boundaries of the volume, and thus the event gets triggered.
With Parrot Sphinx, interacting with the world elements is not wanted, so make sure you delete all the existing Trigger Volumes in the world to prevent Unreal from sending false information to Parrot Sphinx.
Once the Volume has been placed in the level, you can resize or reposition it as you see fit. Scaling the Volume is not recommended. You should modify the Brush Settings in the Details panel instead.
Actor Tags can be used to group multiple areas together. If you assign Actor Tags to a Trigger Volume, they will also be searched for in area functions.
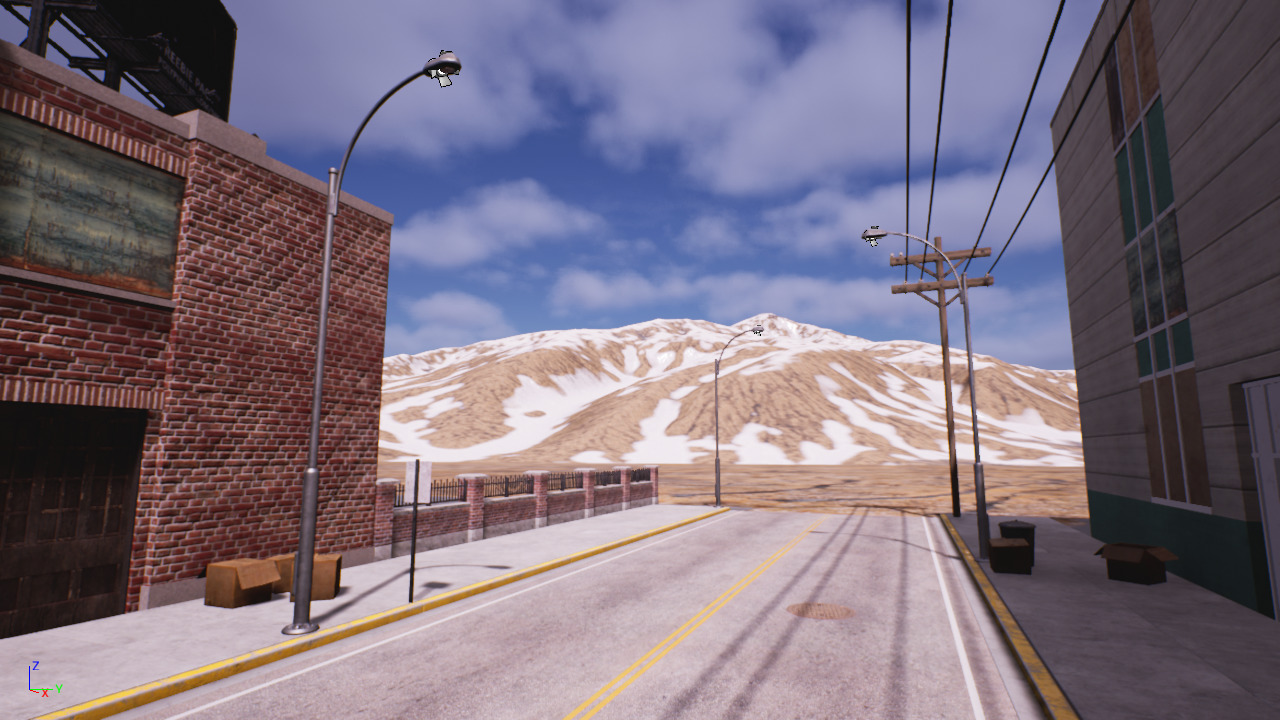
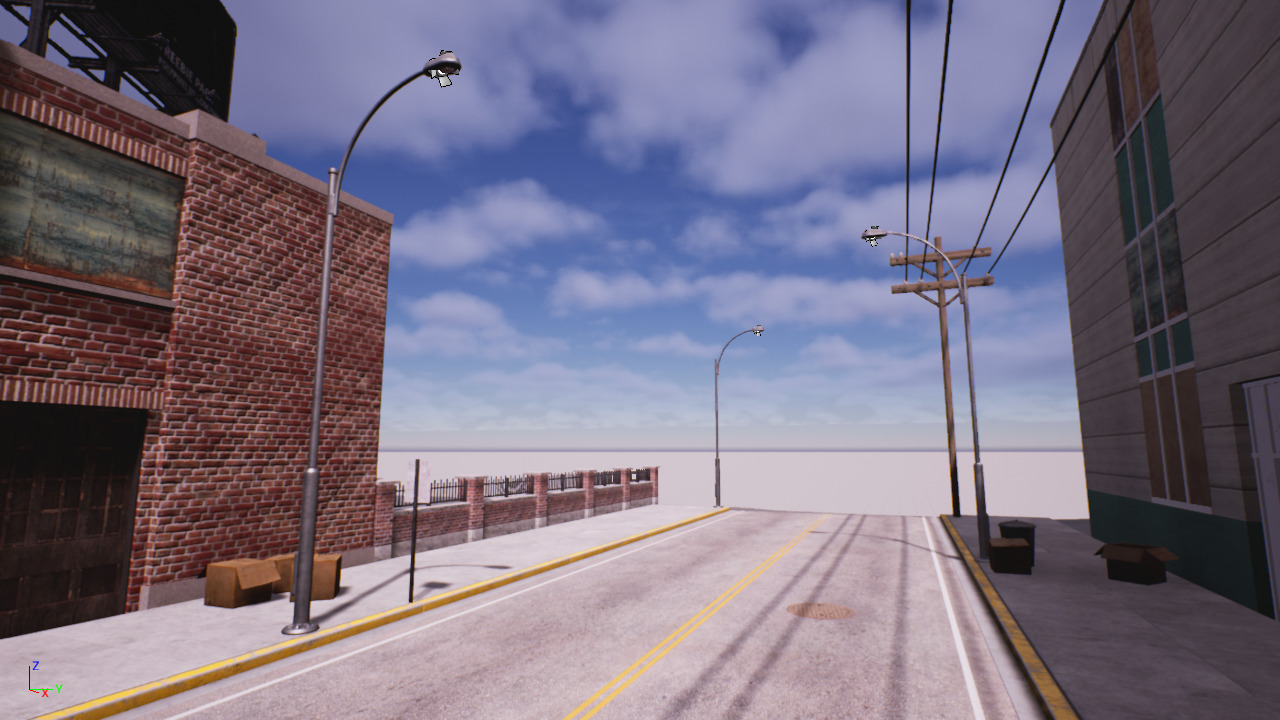
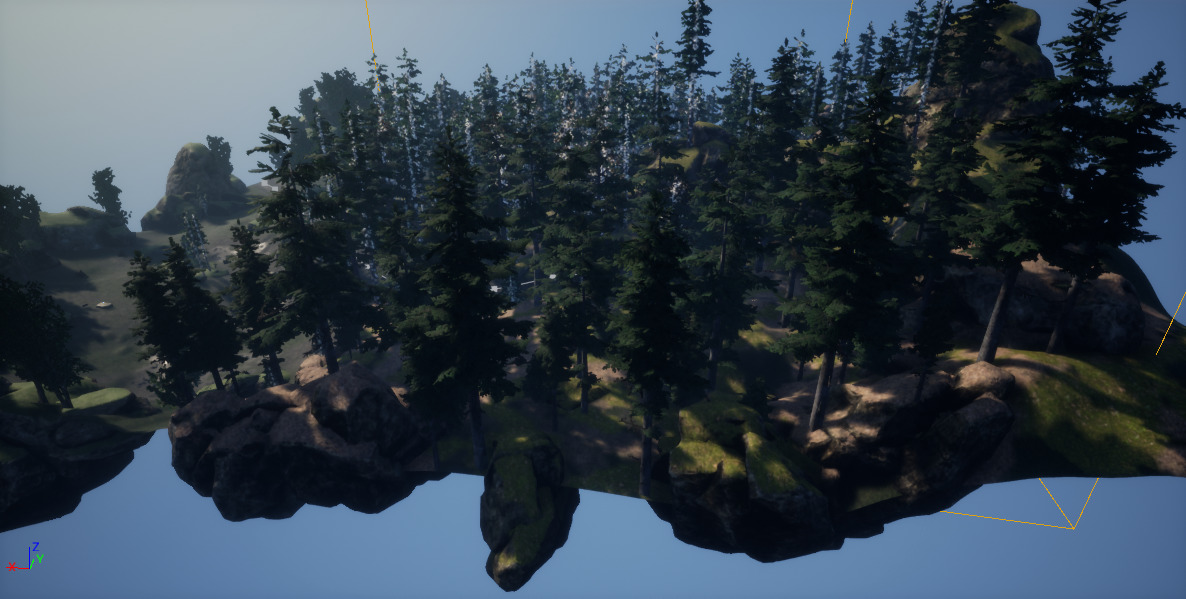
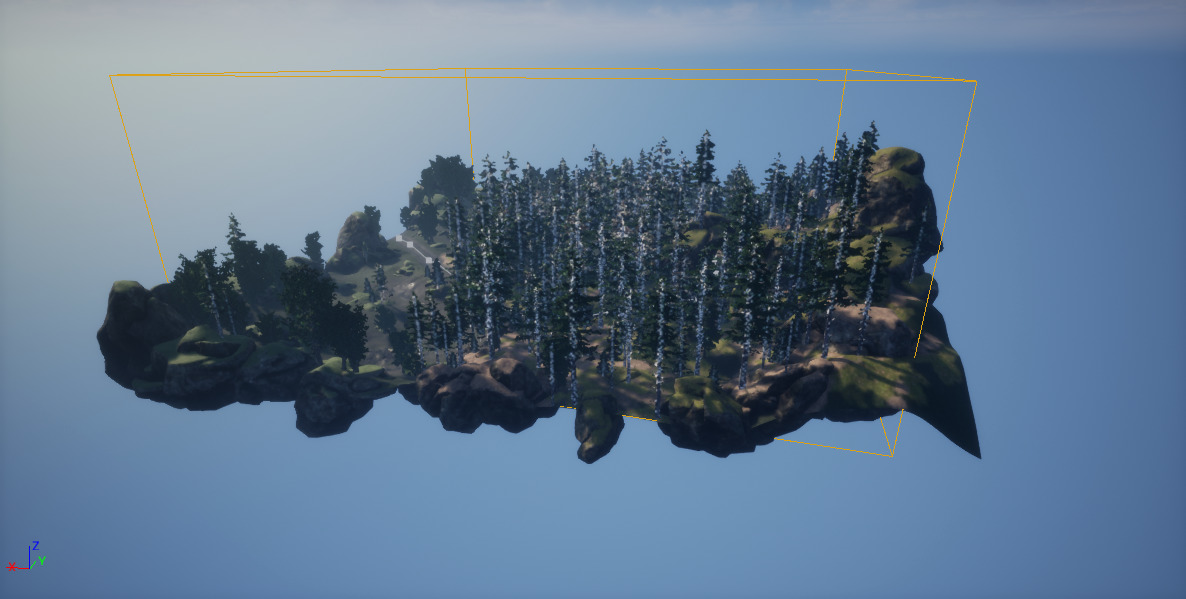
Adding 3D background#
3D backgrounds are used to hide the empty space on the edge of the maps and to hide the horizon.
3D backgrounds are huge meshes in the form of mountains with a reasonable amount of vertices and triangles to keep good performances when being added to the environments.
|
VS |
|
To add the backgrounds, you need to migrate the content from other projects
that already have them. Let’s take for example “industrial_city”. Under
the content folder, you will find a folder named Environment. Right-click
on it, and click Migrate then choose the path to the Content folder
of your project.
Once the backgrounds are migrated, open your new project, and under the
folder Environment, you will find all the available backgrounds. The
content is a bunch of separated meshes that you need to assemble to
have an appropriate mountain. It is not so simple to assemble them,
so it’s recommended to open the map named Overview_Map under
Content/Environment/PhotoR_Backgrounds/Maps and copy-paste the desired
mountain.
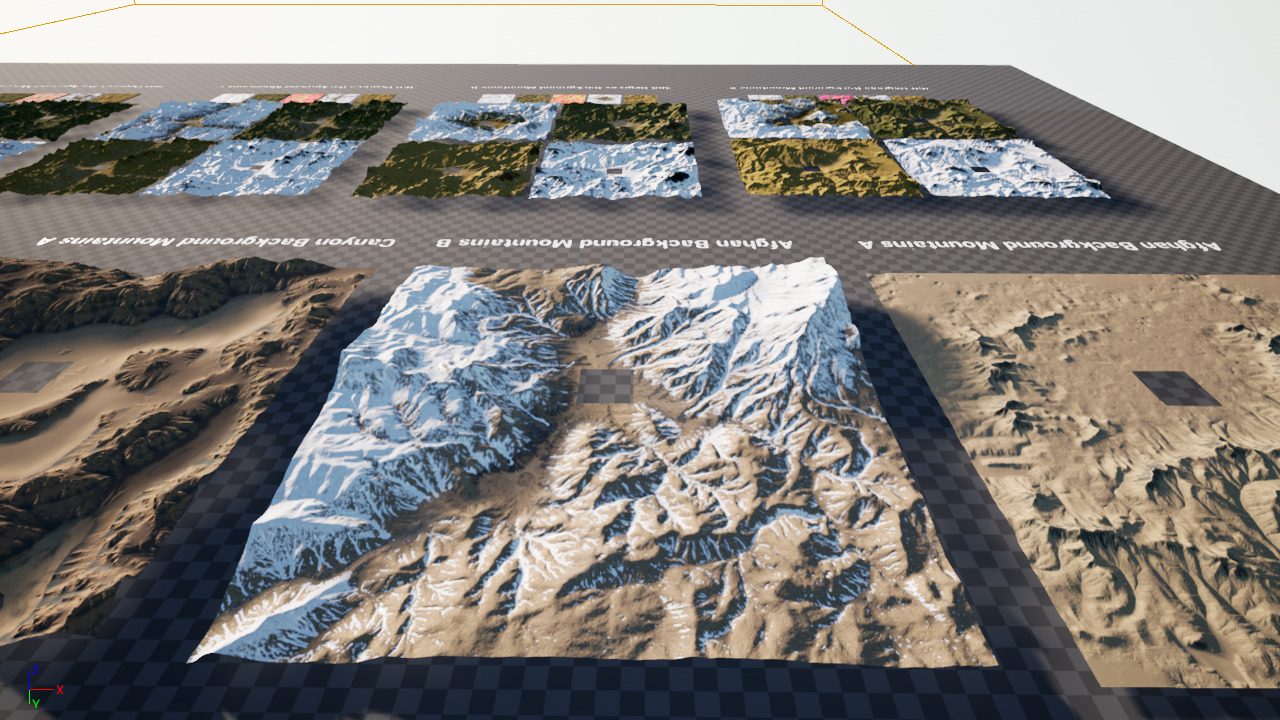
You need to select all the meshes making the mountain and copy/paste them together to keep their relative locations. Once you paste them into your new map, you need to scale them to fit well with the map.
Adjusting transparent shaders [mandatory]#
Some objects use translucent shaders to imitate the transparency behavior, such as windows and glasses, etc… The problem with those materials is that they don’t appear in the depth cameras and the segmentation shaders used by the simulated drone.
To avoid having this problem, there are some settings you need to set in the material parameters:
Allow custom depth writes=> trueopacity mask clip value=> 0
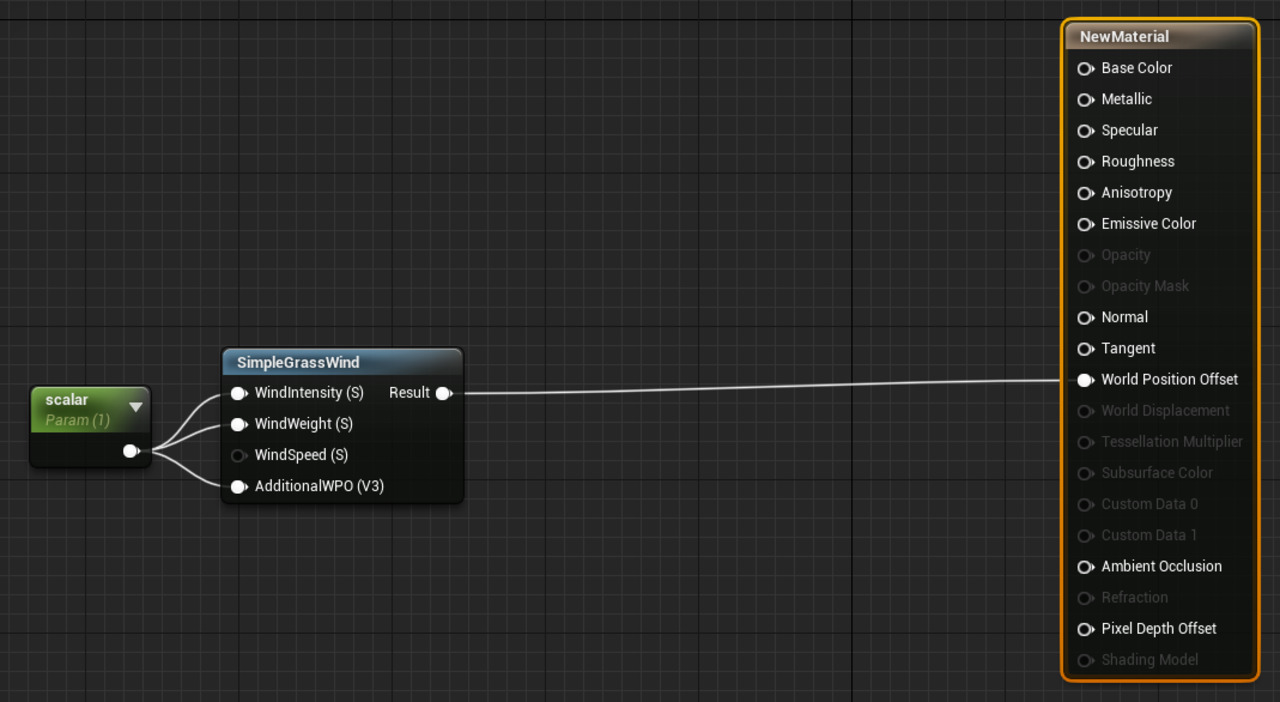
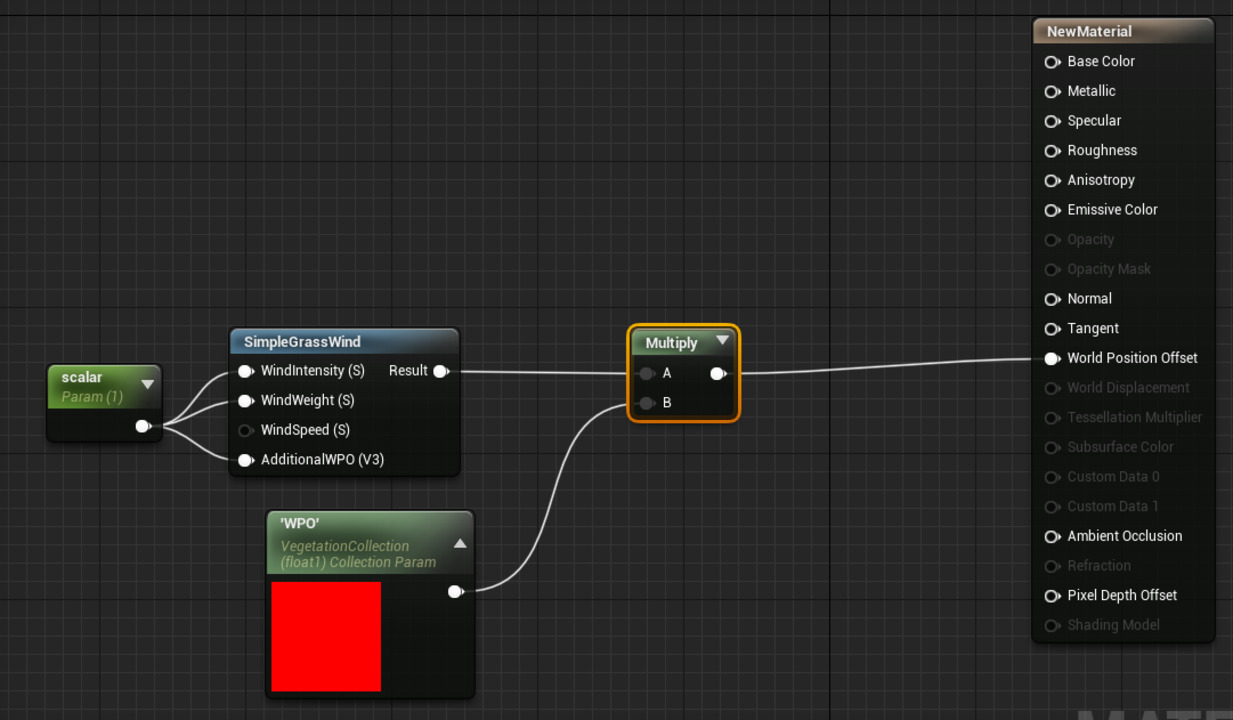
Modifying animated shaders [mandatory]#
Some objects have animated vertices, for example, trees and bushes.
Those objects are animated by their materials using the World position
offset property. This type of animation cannot be controlled at runtime. To
be able to do that you need to adjust those materials by adding a collection
parameter as a multiplier to the value connected to the property. As
shown below:
|
=> |
|
Manually adding the collection and searching for translucent materials to edit
their properties is too slow in case there are many materials,
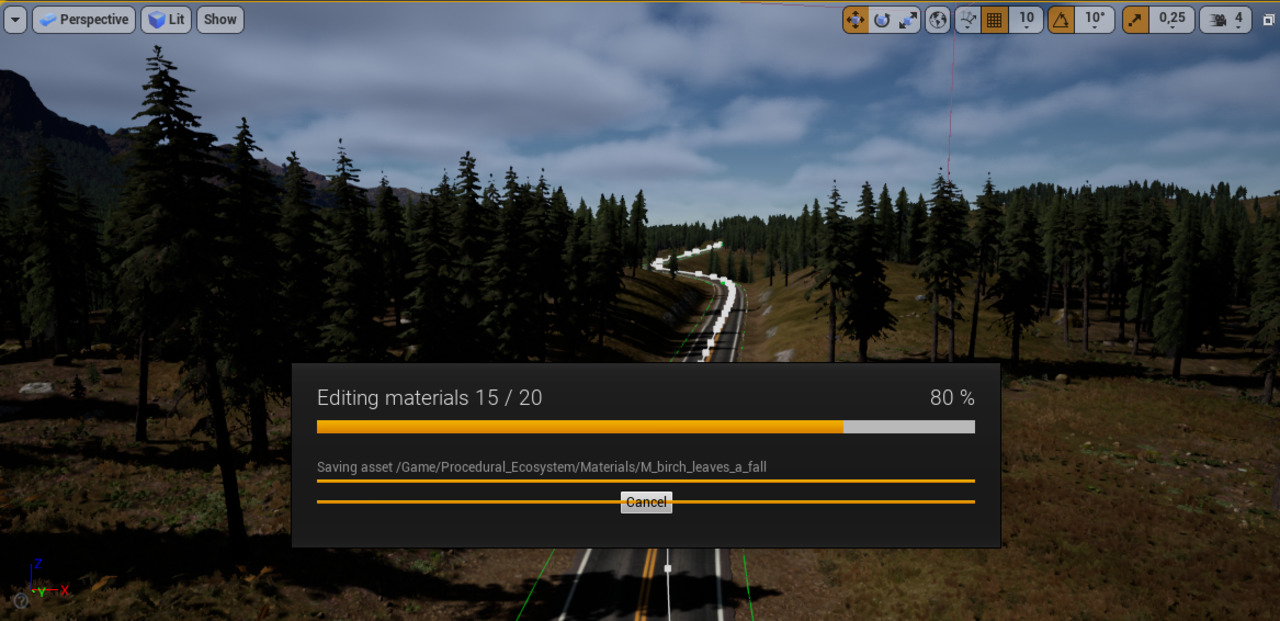
so it is recommended to use the python plugin and the script found under:
/opt/parrot-ue-sdk/edit_material_props.py.
This script will edit all the selected materials in the Content Browser
and compile and save them.
To do so, you need to enable the python plugin within the Unreal Engine’s editor, under Edit > Plugins > Scripting > Python Editor Script Plugin.
Note
A small hint about the material selection. You can filter your content
browser by type. Thanks to that, you can filter by Material
while you are in the root folder of your content.
This will show all the materials of the project and you can select them.
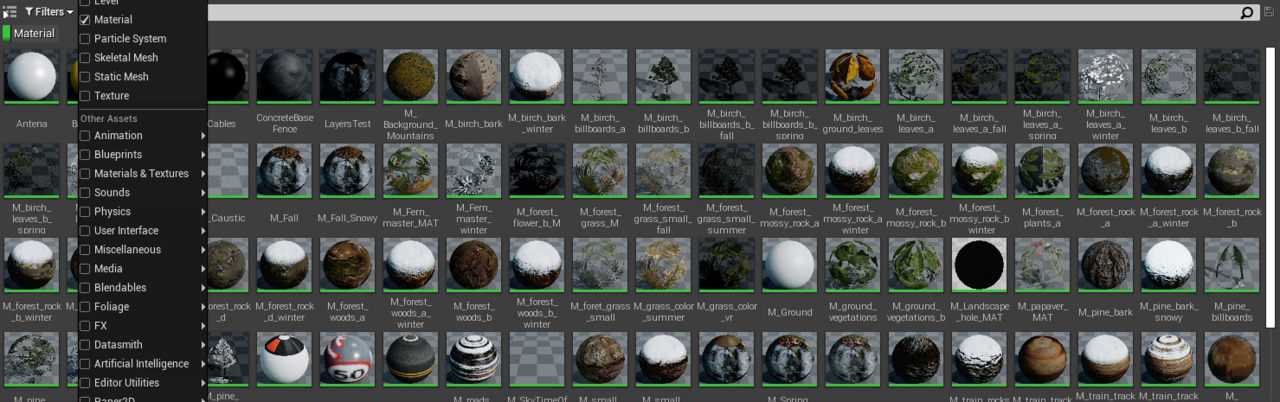
It is also recommended, in case there are a lot of materials, to select multiple materials at once. For example, select up to 20 materials at a time and run the python script, when it is done, select 20 more, etc … This will avoid having the editor crash.
Now all you need to do is select the materials, run the python script using the UE4 terminal found in the output log window, and wait until it ends. When it ends, all the materials using the WPO property will be edited and the collection will be added to them and all the translucent materials will have their properties set.
The collection added to the materials using WPO will be used to control those animations with the Parrot Sphinx dashboard.
About foliage & performance#
In Unreal Engine, there is a feature named “Foliage”. It allows us to paint different objects on the landscape’s surface with better performance than placing the same objects as actors. It unites groups of meshes in clusters, which will be rendered at the same time making this process more efficient. Using “Instanced Static Mesh Components”, all the objects in a cluster will be drawn on the screen at the same time.
You can improve the performances related to the foliage by adjusting some parameters in the foliage and in the mesh itself.
Optimizing with cull distance#
Cull Distance is an optimization tool provided by Unreal Engine that allows for meshes to be culled (not drawn to the screen) based on the distance between the camera and the mesh itself and its size.
To adjust the cull distance, open the foliage mode, select the type of mesh you want to edit, search for cull distance and adjust the min and max distances.
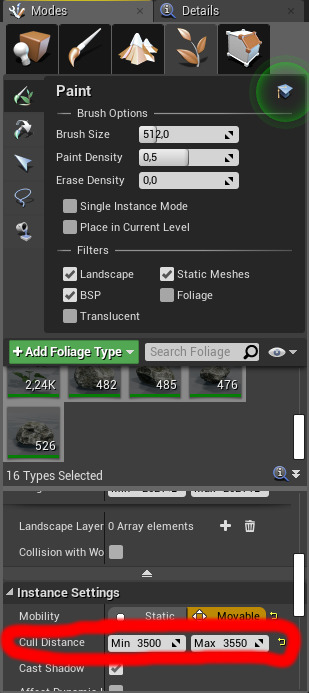
Be aware that the higher value you put in the cull distance, the more it consumes in terms of resources.
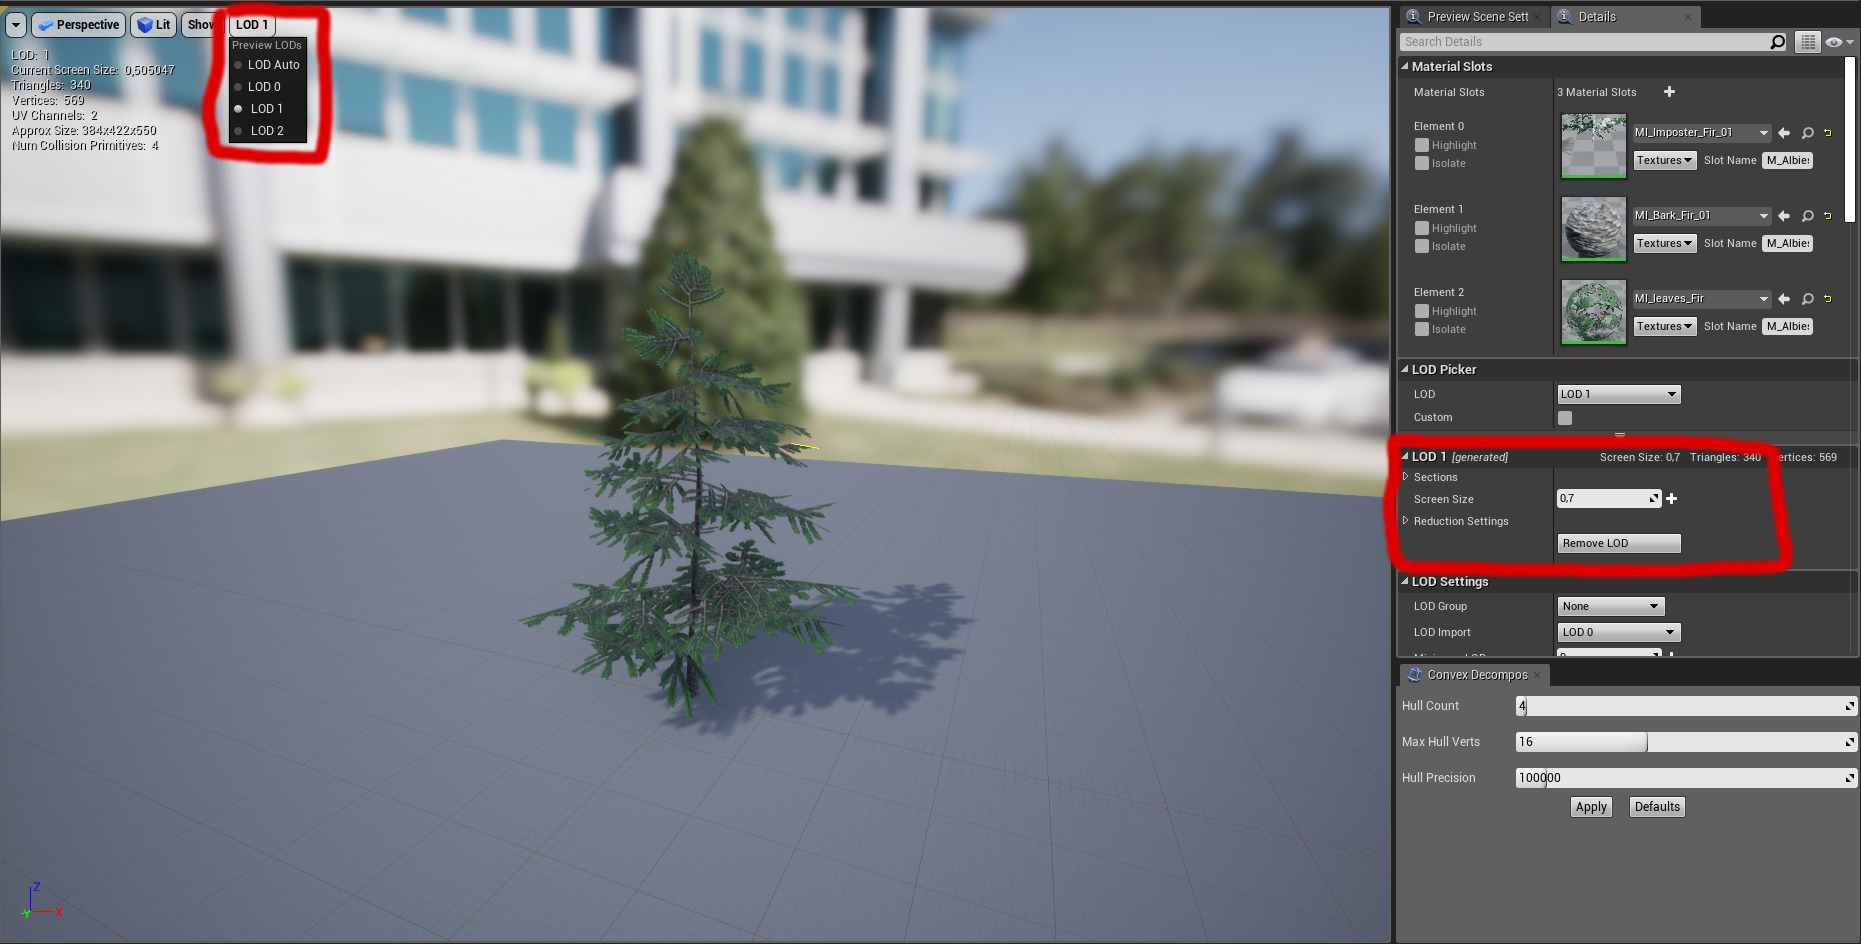
Optimizing with Screen size#
Each mesh has different Levels Of Details, aka LOD. Each LOD has some details of the mesh to be shown when it is selected by the engine. Based on variable distance, the object’s complexity, or textures resolution will gradually decrease to optimize performance.
|
=> |
|
The transition between two levels of details is done based on a variable
named Screen size. This variable defines when to swap from one mesh to
the other as the camera moves closer or farther away.
Replacing imposters [mandatory]#
Some meshes use imposters as the last LOD. Imposters are sprites that use
flipbook style textures to store a view of a Static Mesh from a number of
views stored in a texture. The result is a sprite that matches the original
mesh very well in terms of the material and lighting. However, it leads to
some undesired effects in Parrot Sphinx
(for example with the fisheye camera).
That’s the reason why you need to replace the imposters with geometric LODs.
To identify the imposters, you need to switch to the last LOD, and check if it is a 2D sprite or not, as shown in the video below.
Note
Some imposters are in 3D. You don’t need to replace them.
To replace the imposters, you need to remove the LOD containing them and create a new one.
To remove one LOD, you need to select it using the LOD picker menu
and remove it with the Remove LOD button.
Once the LOD is removed, you can either create manually a new LOD by manually setting its parameters and reduction settings, or ask the engine to recreate automatically all the LODs and set their settings. The easiest way is to ask the engine to do it all automatically, but the best way is to manually create one LOD and adjust its reduction settings to have the best trade-off between the visual and the complexity of the LOD. Because some LODs could be imported from meshes, 3D artists can create custom meshes and import them into Unreal Engine as LODs. But when the editor regenerates the LODs, it removes the existing LODs and replace them with new ones. The new LODs will be the base mesh with reductions applied on the number of its triangles.
To manually add a new LOD, you need to:
Increment the total number of LODs.
Select the new LOD and set its screen size and reduction settings.
Click on
apply changesto apply your new settings.
To automatically recreate new LODs:
Set the wanted number of LODs, the total number.
Check the option
Auto compute LOD distancesApply changes
More details are in UE4’s documentation.
Disable post process effects for fisheye cameras#
Some post-processing effects may introduce artifacts like seams in video frames produced by wide-angle camera sensors. If you plan to simulate fisheye cameras, you should consider applying the following changes:
In you project settings,
Screen Space Global Illuminationmust be disabled.If your scene contains an exponential height fog or an atmospheric fog, make sure that their
Volumetric Fogproperty is disabled.Directional lights must not generate light shafts. If you have directional lights in your scene, make sure that their
Light Shaft OcclusionandLight Shaft Bloomproperties are disabled.
Setting stencil IDs#
Stencil ids are numbers (between 0 and 255) given to meshes
to be used with the segmentation cameras in case the parameter
OverrideExisting is set to true in the stencil file. See
the segmentation camera
for more details.
You can give any value you want to any object you want in the environment, but it is recommended to give them certain values to some types of objects.
Here’s a list of reserved values in the segmentation page
To set the wanted stencil values, you need to select the static mesh
component, search for CustomDepth Stencil Value, and set it to your
custom value.
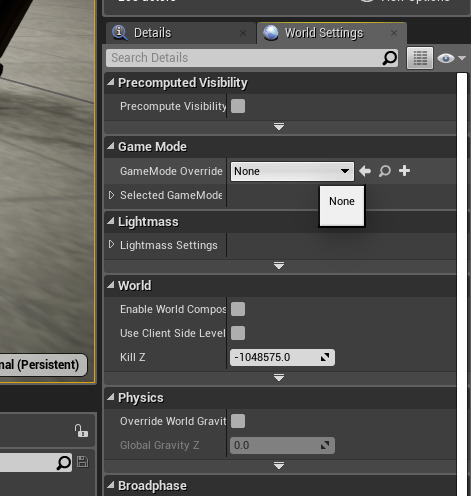
Configuring the GameMode [mandatory]#
The GameMode is an Unreal Engine class used to set some default configurations for the simulation, for example, the pawn to use when a simulation gets started, etc …
GzUE4Bridge comes with its own GameMode. So you need to make sure that
the project doesn’t use any GameModes.
To do so, you need to set the world game mode to None and the project
default game mode to the Unreal Engine base game mode.
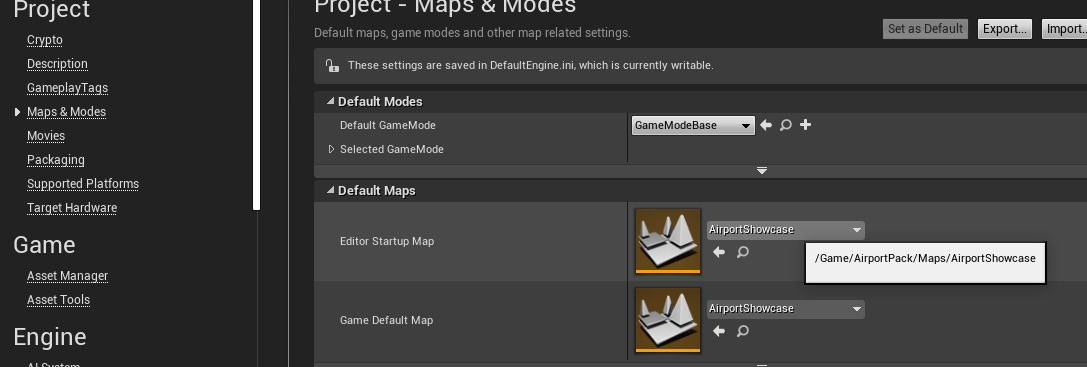
Customizing .ini files [mandatory]#
To be used with Parrot Sphinx, the unreal project will be built with different
plugins. The main plugin is GzUE4Bridge. As mentioned earlier, the
plugin comes with its proper game mode, and it should be set as the project
game mode.
To prepare your project to host the main plugin, you need to add the
following lines in the .ini file Config/DefaultEngine.ini
(leave the comments as they are):
[/Script/EngineSettings.GameMapsSettings]
EditorStartupMap=/Game/Vicon/Map/<your_map>
GameDefaultMap=/Game/Vicon/Map/<your_map>
;GlobalDefaultGameMode=/Script/@@@GAMEMODE@@@
;GameInstanceClass=/Script/@@@GAMEINST@@@
Parrot Sphinx expects the project to be configured with extended luminance range
enabled to set physically accurate lighting ranges. You must enable this option
by making sure that .ini file Config/DefaultEngine.ini contains the
following lines:
[/Script/Engine.RendererSettings]
r.DefaultFeature.AutoExposure.ExtendDefaultLuminanceRange=True
Sometimes, the project contains many levels and they are not all meant to be used. For example, when you get a new environment from the marketplace, the Epic Games policy forces the content creator to provide an overview map with all the assets in it. One way to get rid of those maps is to delete them from the content folder, but you can also decide to keep them in the project and not include them in the package application.
In that case, you need to tell the project which map you want to add to the packaged application, this will also reduce the package size.
To do so, you need to add the levels you want to package to the
Config/DefaultGame.ini file. Here’s an example that shows how to add levels:
[/Script/UnrealEd.ProjectPackagingSettings]
+MapsToCook=(FilePath="/Game/Procedural_Ecosystem/Maps/main")
+MapsToCook=(FilePath="/Game/Procedural_Ecosystem/Maps/progressive_forest")
+MapsToCook=(FilePath="/Game/Procedural_Ecosystem/Maps/pylons")
+MapsToCook=(FilePath="/Game/Procedural_Ecosystem/Maps/transmission_towers")
+MapsToCook=(FilePath="/Game/Procedural_Ecosystem/Maps/winter")