How to speed the simulation up#
Depending on many factors, it may happen that the simulation speed appears too low. This section lists up several hints to improve the real-time factor, given a certain amount of CPU/GPU/RAM resources available.
Observing the real-time factor#
The real-time factor can be seen on the right corner of the menu bar.
You can also get it from the command line,
$ tlm-data-logger inet:127.0.0.1:9060 |grep "real_time_factor"
A graphical view is also available using the Web dashboard. You just need to
search for the variable called real_time_factor.

Choice of the world#
The complexity and the size of the chosen UE4 scene may have a big impact over the real-time performance.
If you meet some real-time issues, it is better to start with a world as minimalistic as possible, such as:
parrot-ue4-empty
parrot-ue4-sphx-tests (level main)
Adjusting the graphic quality level#
The -quality option allows you to adjust the graphic quality level. It can
be set to one of the following values: low or high (the default).
The simulation runs significantly faster in low mode at the cost of
degrading the quality of the images produced by cameras and the UE4 HMI.
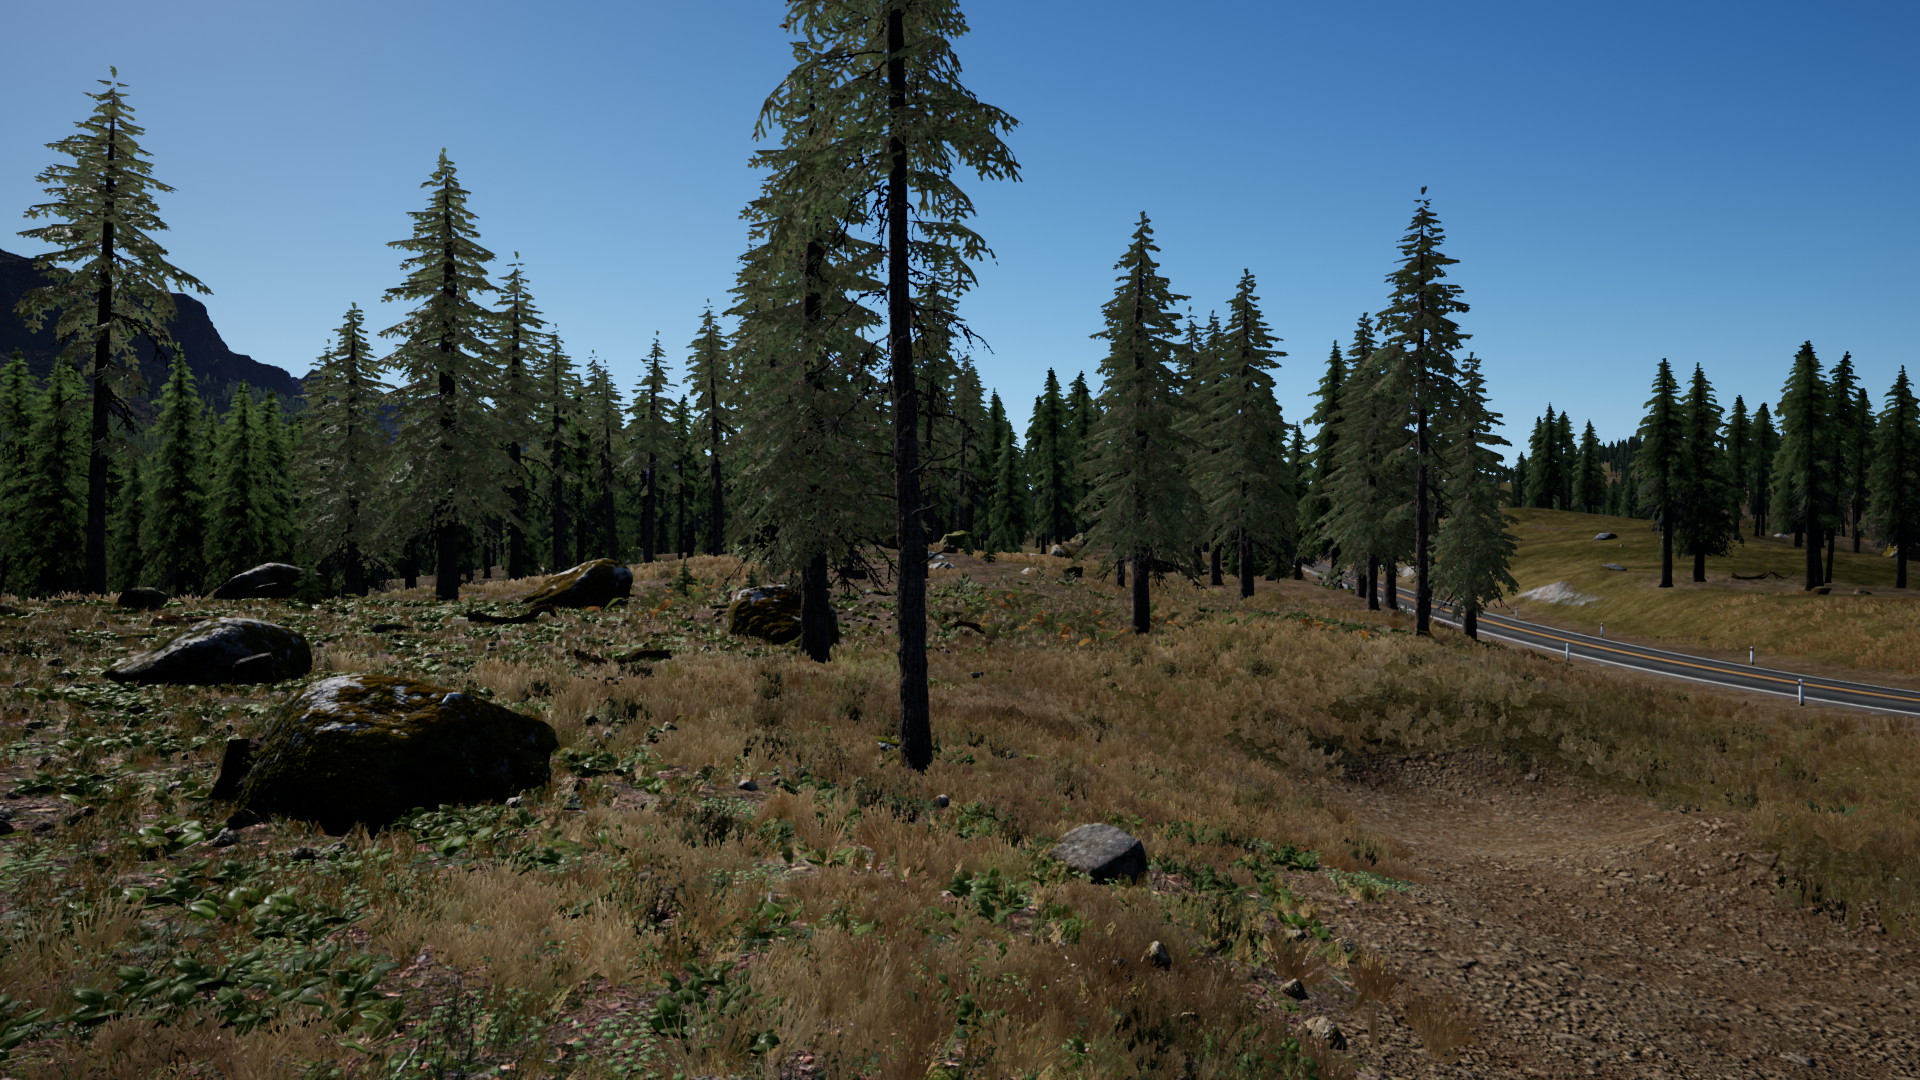
The world “Landscape ecosystem” with -quality=high#
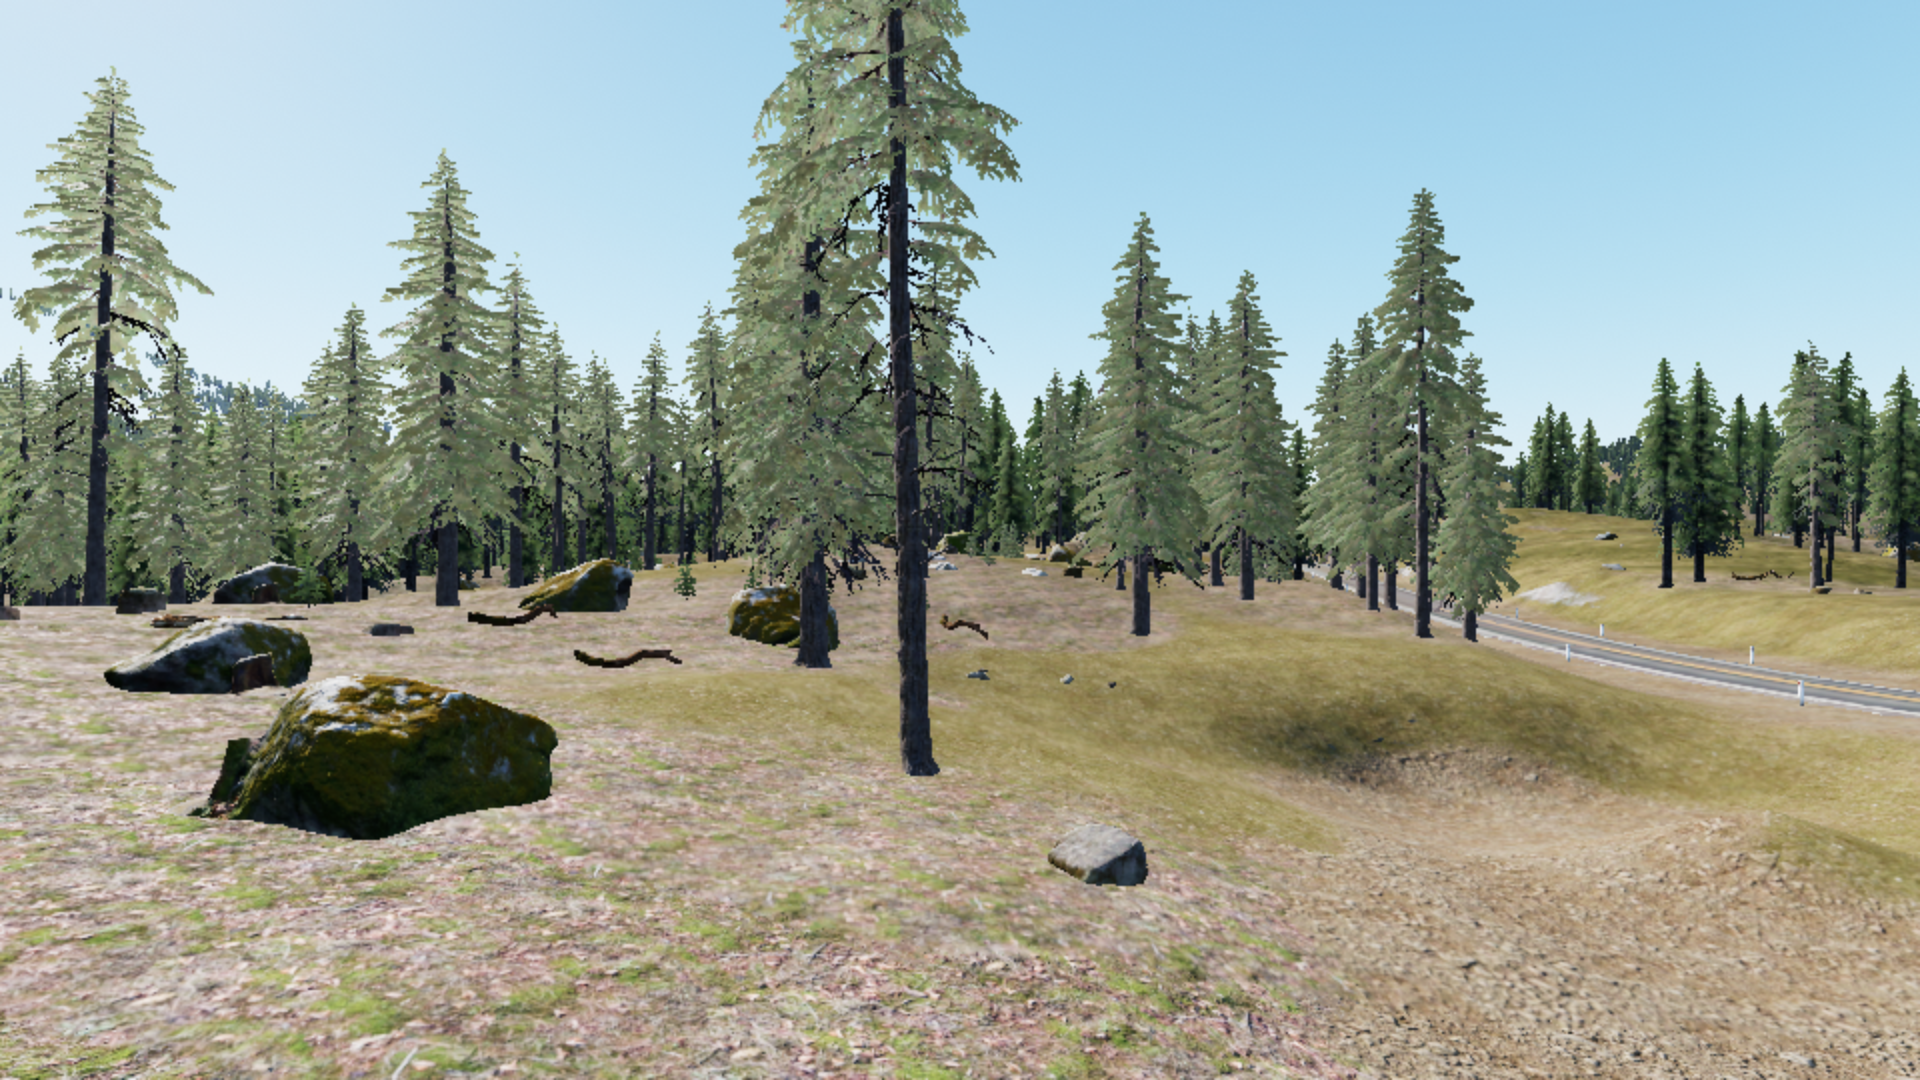
The world “Landscape ecosystem” with -quality=low#
Impact from the UE4 HMI#
The way you configure the UE4 window has a great influence over the real-time behavior.
First, its size is important. The smaller, the better. Especially if your screen has a 4K resolution.
Second, turning on embedded camera slots can be consuming when the related camera is not used by the simulated machine. Even if the three panels at the bottom of the window are of a small dimension, they make the rendering engine work intensively, especially if the camera is in high-resolution. So it is advised to turn on one or several panels only when needed.
Note
It is also possible to switch off all renderings for HMI by running the
application headless. To achieve that, add the option -RenderOffScreen
in the parrot-ue4-xxxxx command line
Deactivating simulated cameras#
In many cases, the bottle neck is the time needed for the renderings. That’s the reason why it is important to be aware of which cameras are active when the real-time factor is low.
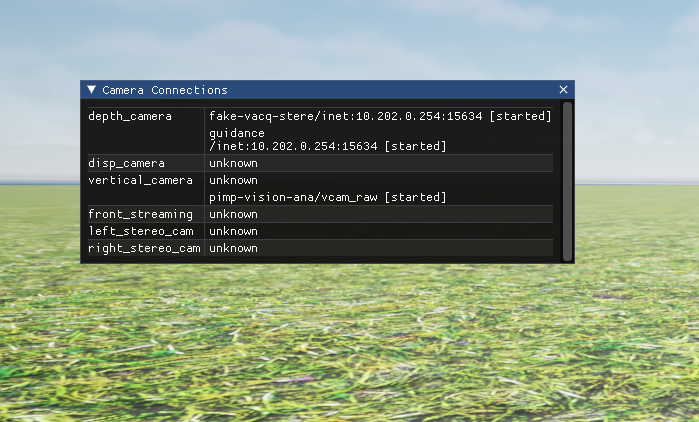
To know the active cameras, select the Camera Connections from the
Window menu in the menu bar or press the R key. A new window will pop up
and show a list of cameras. The active ones are the ones for which a process has
the property [started].
Once the names of the greedy cameras are known, these may be deactivated using
the following options either in the sphinx command line
or in the .drone file.
with_front_cam=0: do not instantiate any front-related camera.with_front_stcam=0: do not instantiate any stereo camera (only for ANAFI Ai). In that case, the drone may behave unexpectedly in a few flight states.