Populate the scene with actors#
About Actor Movement System#
Actor Movement System, aka AMS, is an Unreal Engine plugin made by Parrot. It allows the end-user to put one or more moving targets - also called “actors” in this documentation - into the scene and make them move along a given path.
These moving targets can be of several shapes. So far, human pedestrians and vehicles are supported.
You can configure AMS to have one or several actors in the scene. Each actor follows a path that is either predefined in the world, or added by the user. You can get the list of the available actors and paths using specific command line options.
Among all actors in the scene, there can be maximum one “pilot” for a simulated drone. The choice of this actor is made in the UE application command line. Of course, it is not necessary to have a pilot in the scene.
During the whole simulation, a “pilot” sends his GPS and barometer data to the drone firmware. This way, the drone can perform tasks such as target following.
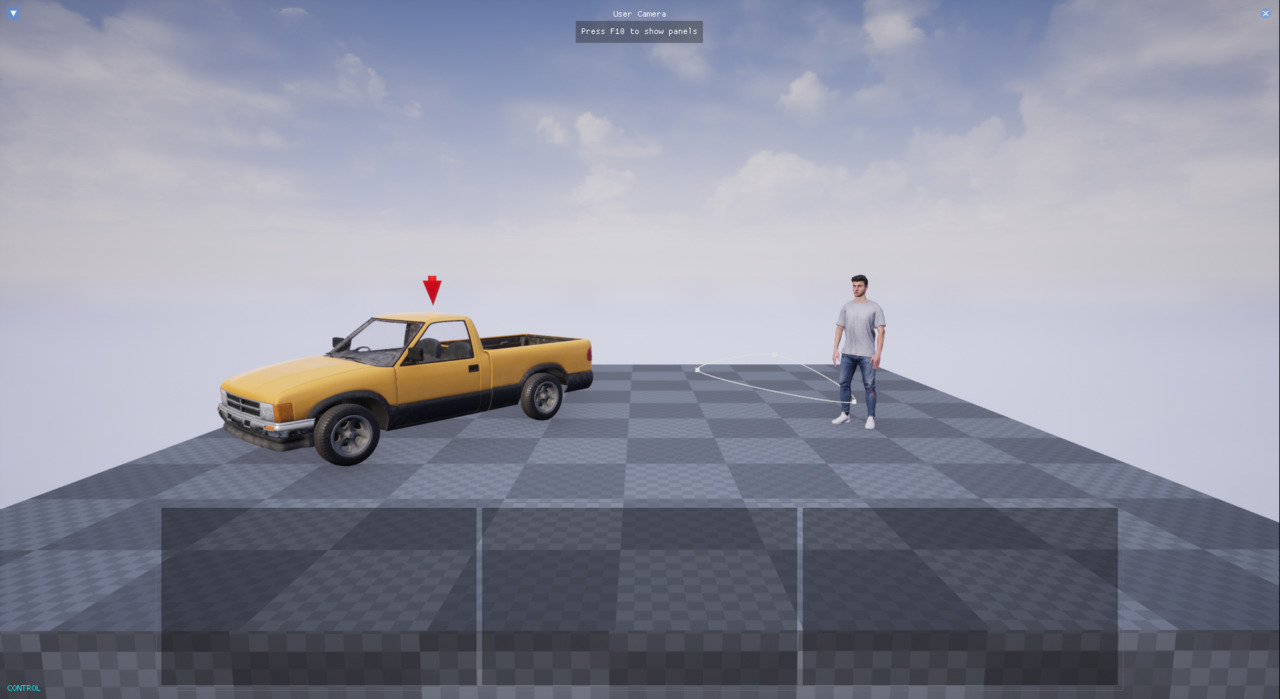
In the example below, one pedestrian (Jasper) and one car (Pickup) are spawned.
The pilot of the drone is the car (check the :* suffix).
$ parrot-ue4-empty -ams-path="DefaultPath,Pickup:*" -ams-path="RunPath,Jasper"
At startup, actors are all in “pause”.
To make them move, set the Web dashboard parameter pause to false.
Here’s the command line to do that:
$ sphinx-cli param -m world actors pause false
The sections below go more into details. In particular, they explain how to place a visual tag on a car and how to make a pedestrian lift his arm. They also give instructions to create your own visual tags and your own paths.
List available actors#
The command -list-actors shows the available pedestrians and vehicles
that can be used. They are common for all UE4 applications.
$ parrot-ue4-empty -list-actors
== Available Characters ======================================
- Malcolm
- Stefani
- Jasper
==============================================================
== Available Vehicles ========================================
- Hatchback
- SUV
- Pickup
- SportsCar
- BoxTruck
==============================================================
List available paths#
The command -list-paths shows the different paths predefined
in a given world level.
$ parrot-ue4-forest -level=main -list-paths
== Available Paths ===========================================
Path name : DefaultPath
==============================================================
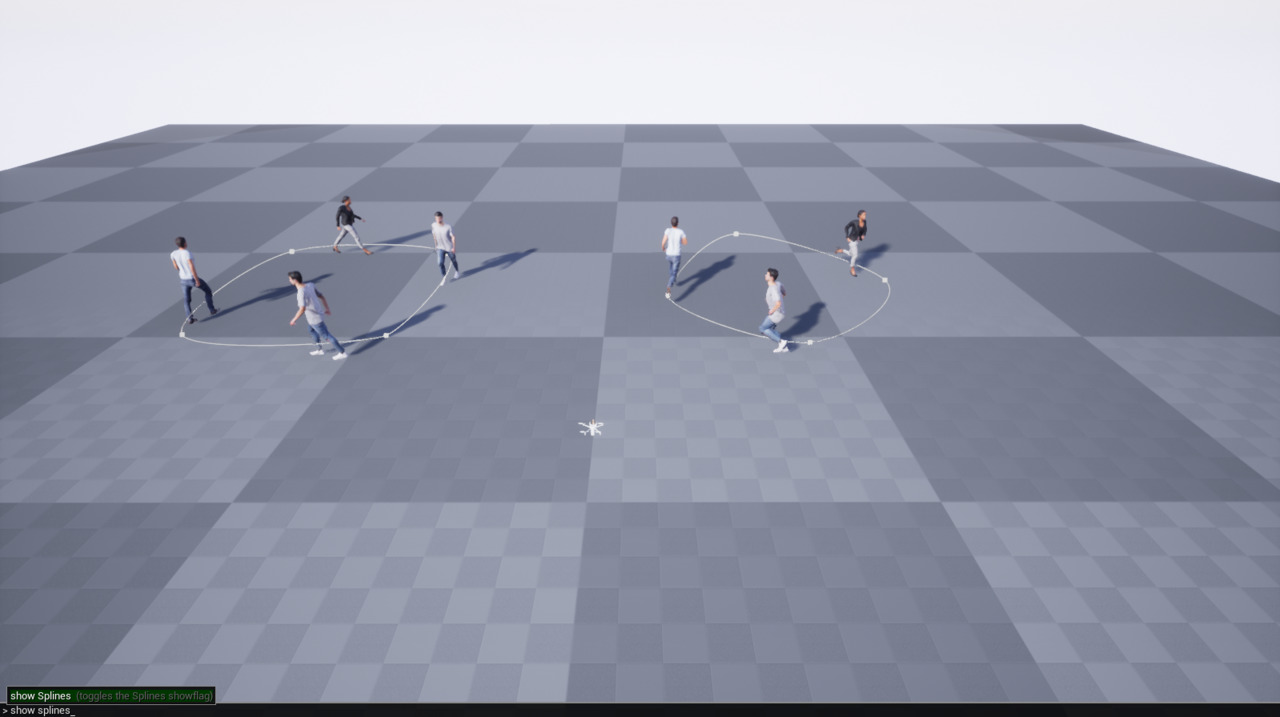
The available paths are visible in the scene from the HMI cameras. For more details, see Unreal cameras.
Spawn actors#
The option -ams-path= tells the plugin to spawn N moving targets along
the path called PathName.
You can append several of this option in the same command line.
It is formatted as follows:
-ams-path=<PathName>,<Actor1[:<drone>]>[,<Actor2>,...]
When several actors are set in the same path, they will be spawned evenly all along the path so that the risk of collision gets reduced. That being said, if the actors do not have the same speed, collisions are likely to happen.
To designate a given actor as the pilot of the drone,
you need to append “:<drone_name>” after the name of the actor.
The wildcard * can be used if you do not want
to bother with giving the right drone name. In that case, the first drone
found in the simulation will be taken.
Example:
$ parrot-ue4-empty -ams-path="DefaultPath,Pickup:*" -ams-path=RunPath,Jasper
Note
It is not possible to have several actors piloting the same drone at the same time. As a consequence, the wildcard ‘*’ should be used only once in the command line.
Warning
If you are using zsh, the wildcard ‘*’ must be escaped with ‘', or the whole string must be enclosed in double quotes (as in the example above).
In the HMI cameras, the piloting actor always has a red marker above itself.
If you want to spawn pedestrians and vehicles on the same path, pedestrians would be spawned before vehicles even if you write the vehicles names at first in the command line. This order was chosen to avoid any unwanted collision between a vehicle and a pedestrian because of their different speed.
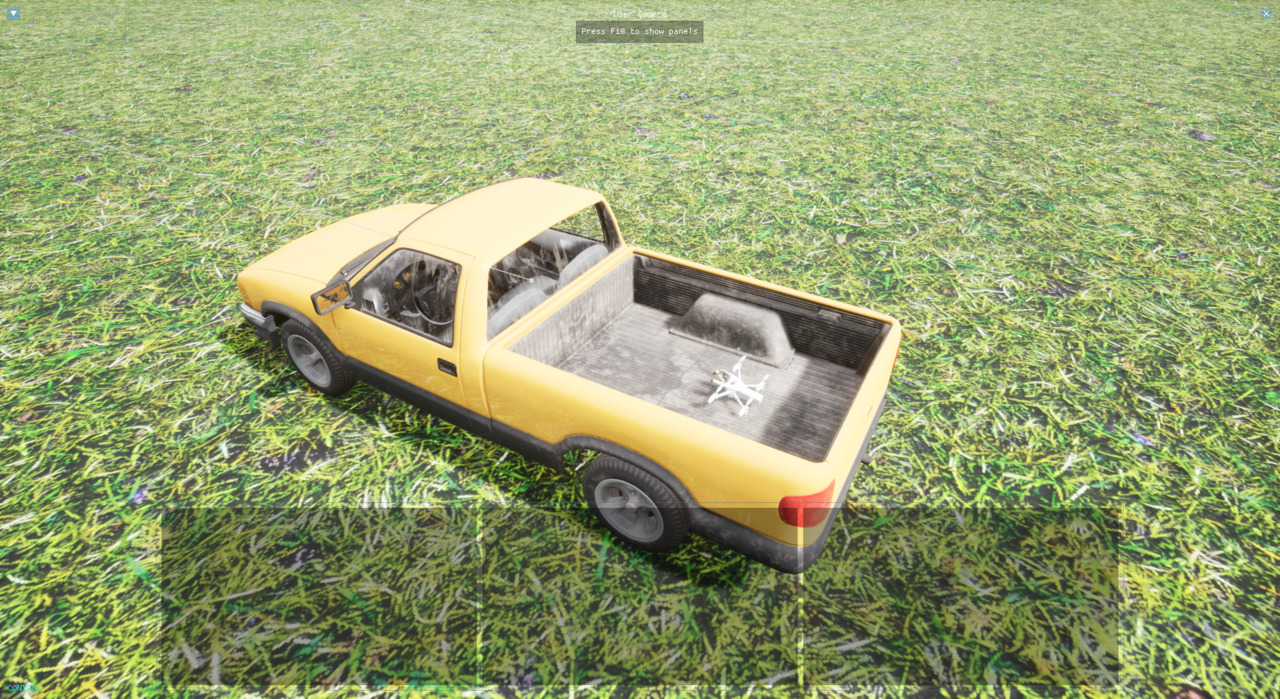
Take off from vehicle using AMS#
First you need to spawn a vehicle using AMS then you need to specify the name of that vehicle using the command line argument ::pose=
Command line example:
$ sphinx <my.drone>::pose="pickup" & parrot-ue4-empty -ams-path=DefaultPath,Pickup
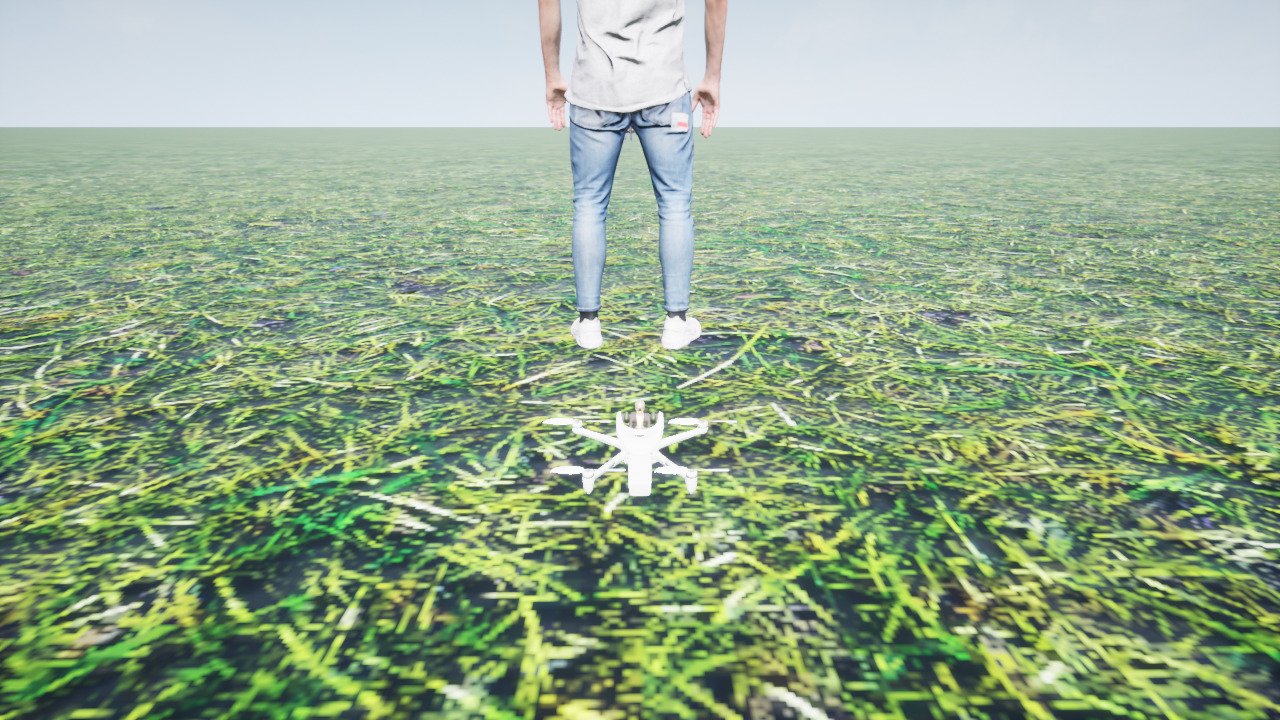
Spawn drone near pedestrians#
First you need to spawn a pedestrian using AMS then you need to specify his name
using the command line argument ::pose=, same thing as vehicles.
The drone are spawned 1 meter behind the selected pedestrian.
Command line example:
$ sphinx <my.drone>::pose="Jasper" & parrot-ue4-empty -ams-path=DefaultPath,Jasper
Note
All available spawn points for actors can be listed using the UE4 app’s
command line -list-spawn-points.
More information HERE.
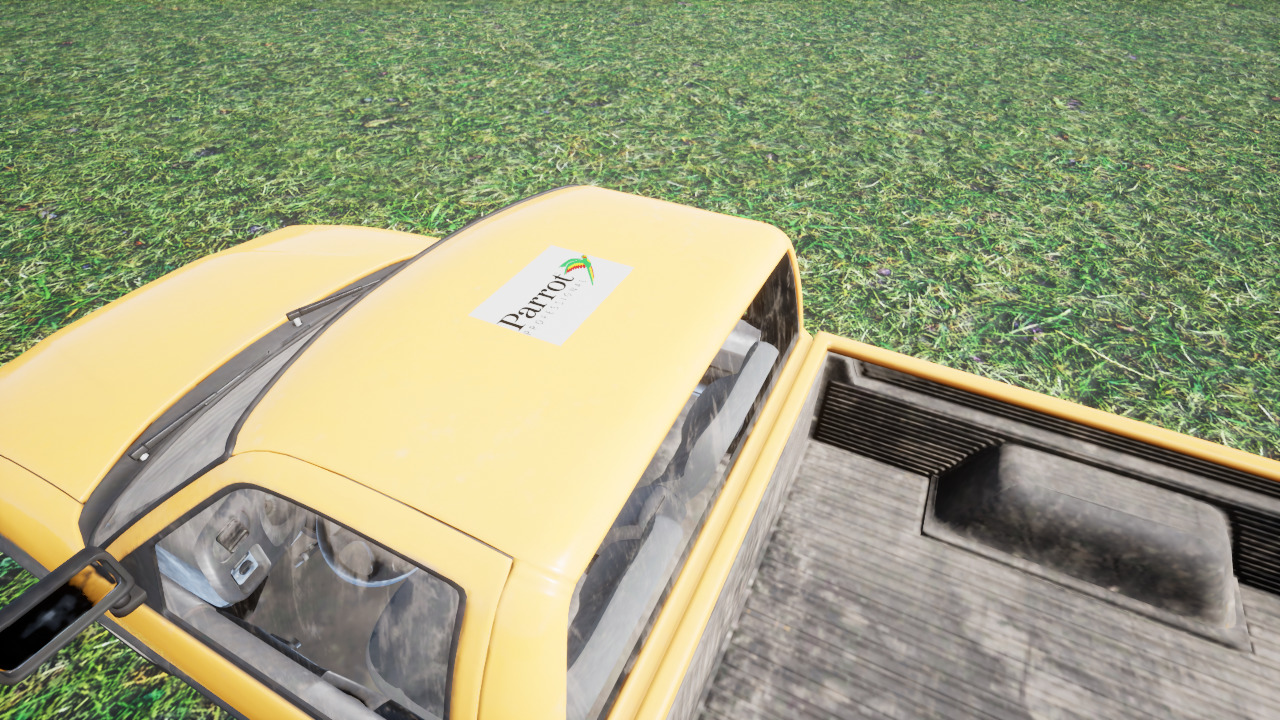
Attaching tags to vehicles#
Vehicles can have a visual tag placed on their roof.
Once you spawn one or several vehicles, you can set the same tag to all of
them using the web dashboard (or sphinx-cli).
The parameter tags_name takes the name of the desired texture.
The list of available textures is below.
parrot_landingparrot_logoh_boostwhite_logoempty string will hide the tag
wrong name will hide the tag with an error
Here’s a command line example to set the tags_name parameter:
$ sphinx-cli param -m world actors tags_name parrot_logo
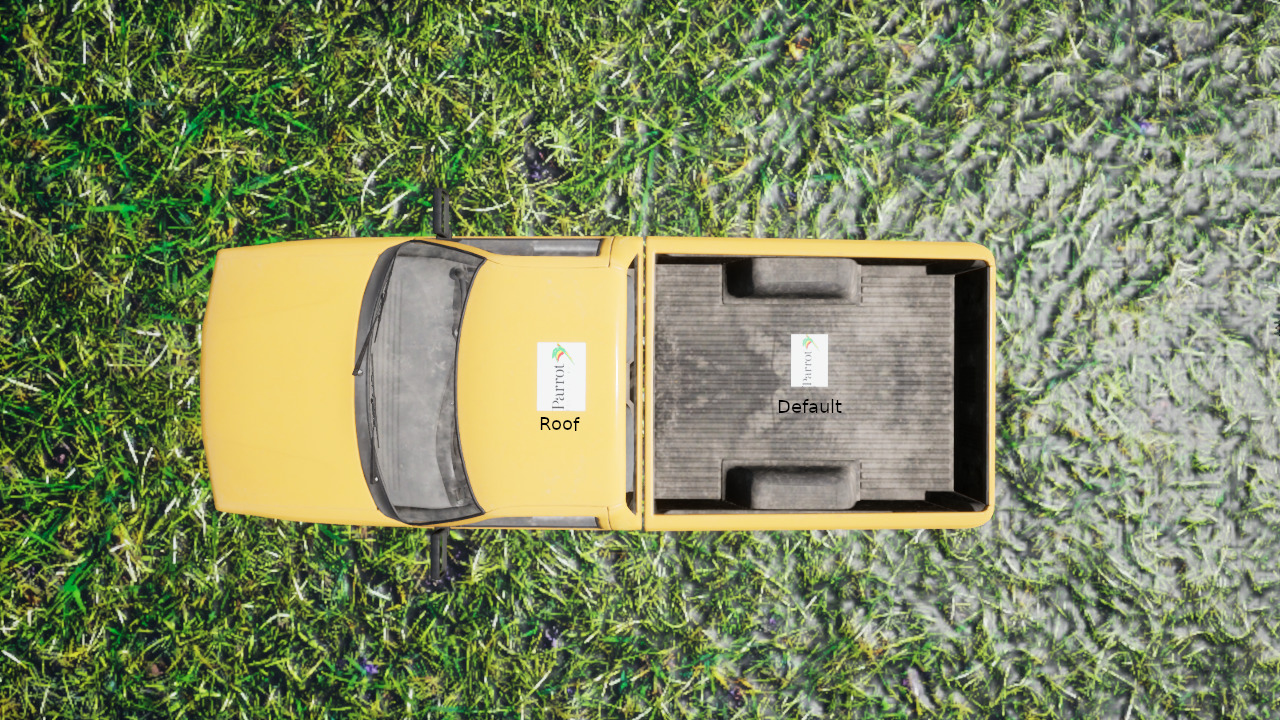
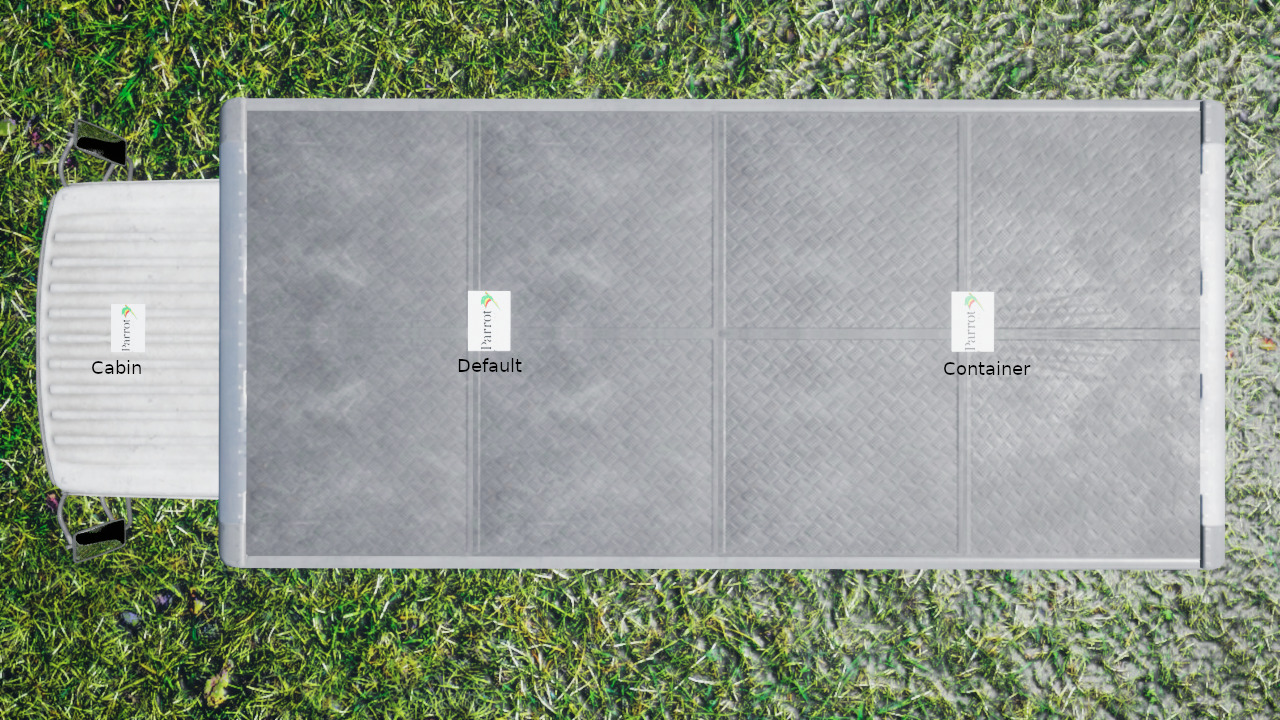
The parameter tags_location specifies the position of the tag on the
vehicle from a list of a predefined positions for each vehicle.
Every single vehicle has a tag location named Default,
which is the location used when nothing or something wrong is given.
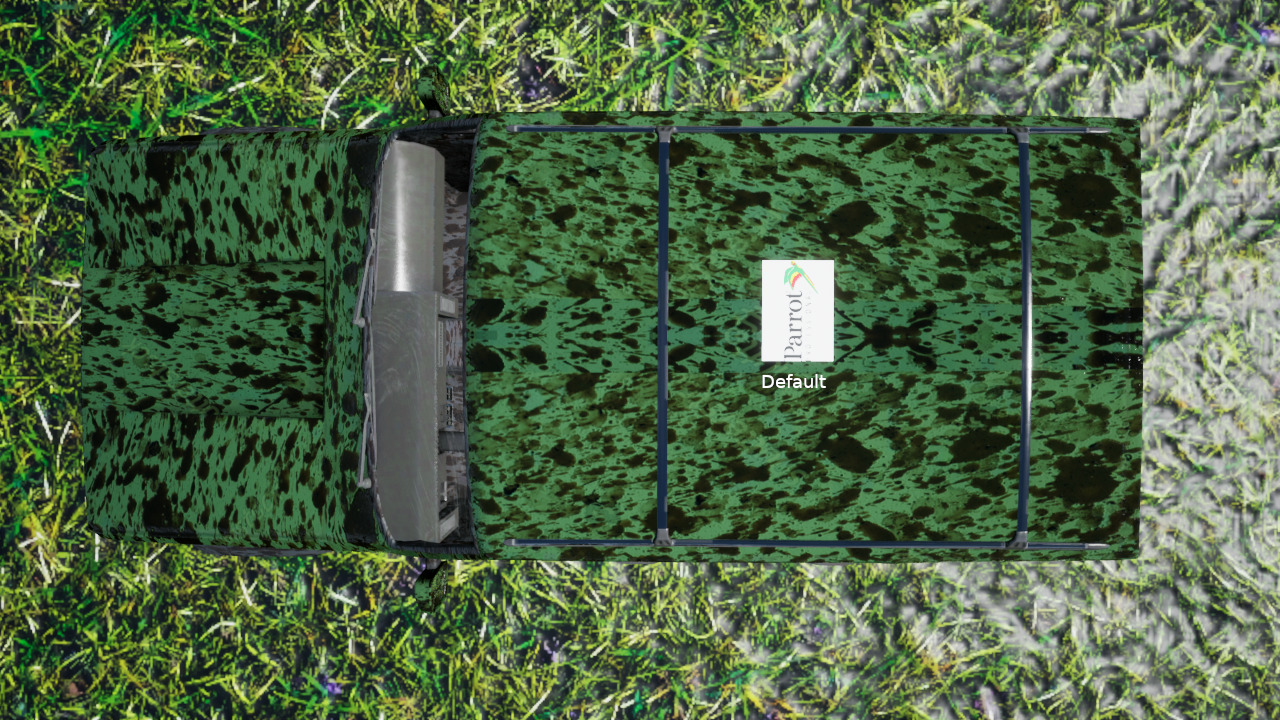
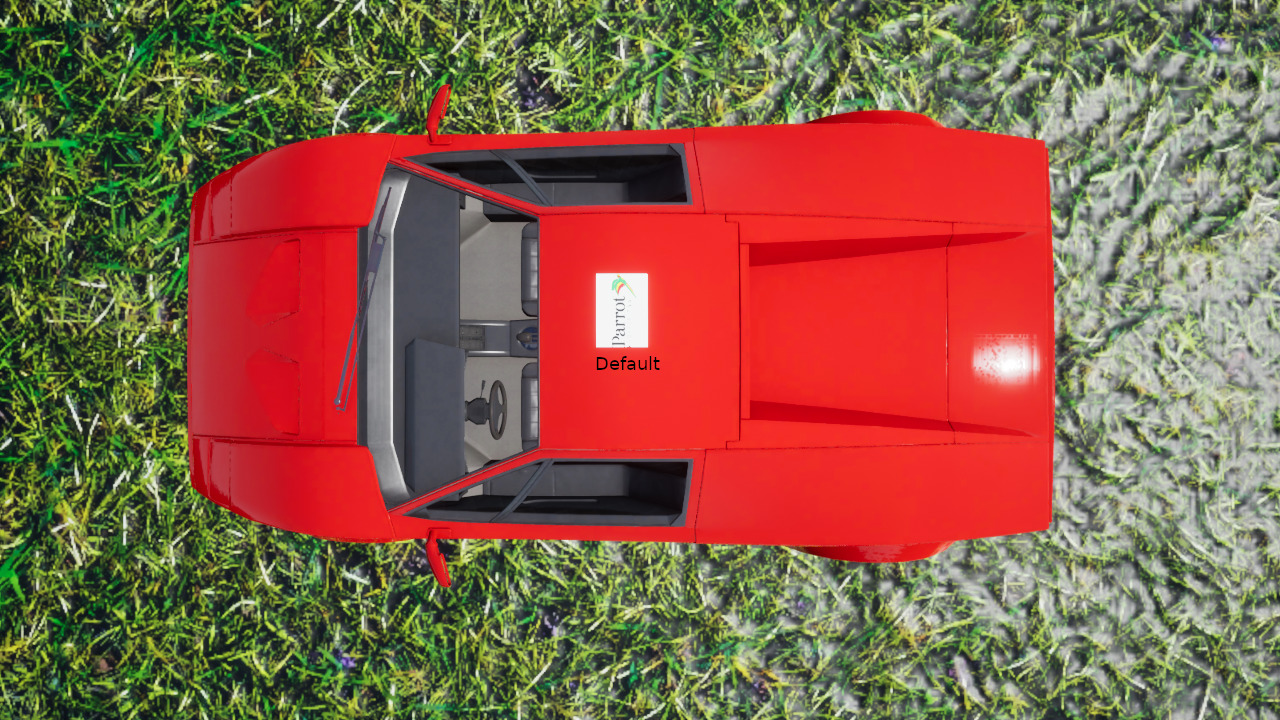
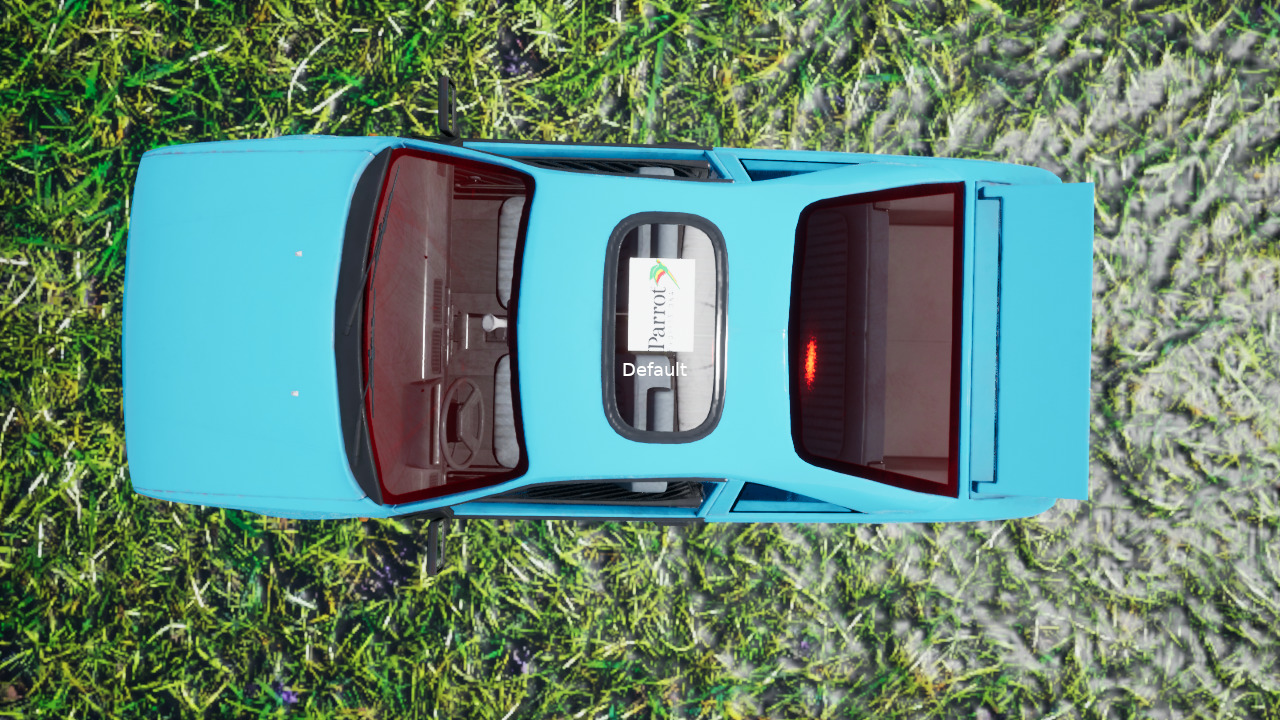
The images below show all the available tag positions and names
for each vehicle.
Pickup
Suv
SportsCar
Hatchback
BoxTruck
Here’s a command line example to set the tags_location parameter:
$ sphinx-cli param -m world actors tags_location roof
The parameter tags_material takes the name of the desired material to use
with the tag.
The list of available materials is below.
DefaultNoReflections
Wrong material name will display an error in the terminal.
Here’s a command line example to set the tags_material parameter:
$ sphinx-cli param -m world actors tags_material NoReflections
By default, all tags have the form of a square with a 73 cm edge.
However, these dimensions can be changed by setting the parameters
tags_width and tags_height using the Web dashboard or sphinx-cli.
Note: values are expressed in cm.
Here’s a command line example :
$ sphinx-cli param -m world actors tags_width 40
$ sphinx-cli param -m world actors tags_height 30
The parameters tags_offset_x, tags_offset_y and tags_offset_z
add offsets to the tag’s location in its local reference frame.
Note: Values are expressed in cm.
Here’s a command line example to shift the position of the current tag:
$ sphinx-cli param -m world actors tags_offset_x 5
$ sphinx-cli param -m world actors tags_offset_y 10
$ sphinx-cli param -m world actors tags_offset_z 20
Note
Changing the tag’s location by editing the parameter tags_location
resets all offsets.
Lift actor’s hand#
In addition of standing, walking and running, a pedestrian can lift his right hand to a 90° angle.
First you need to spawn a pedestrian using AMS. Then using the web dashboard
(or sphinx-cli), you can set the parameter lift_hand to raise/lower
the actor’s arm.
Note
The pedestrian must be paused to be able to lift his hand.
Here’s a command line example to set the lift_hand parameter:
$ sphinx-cli param -m world actors lift_hand true
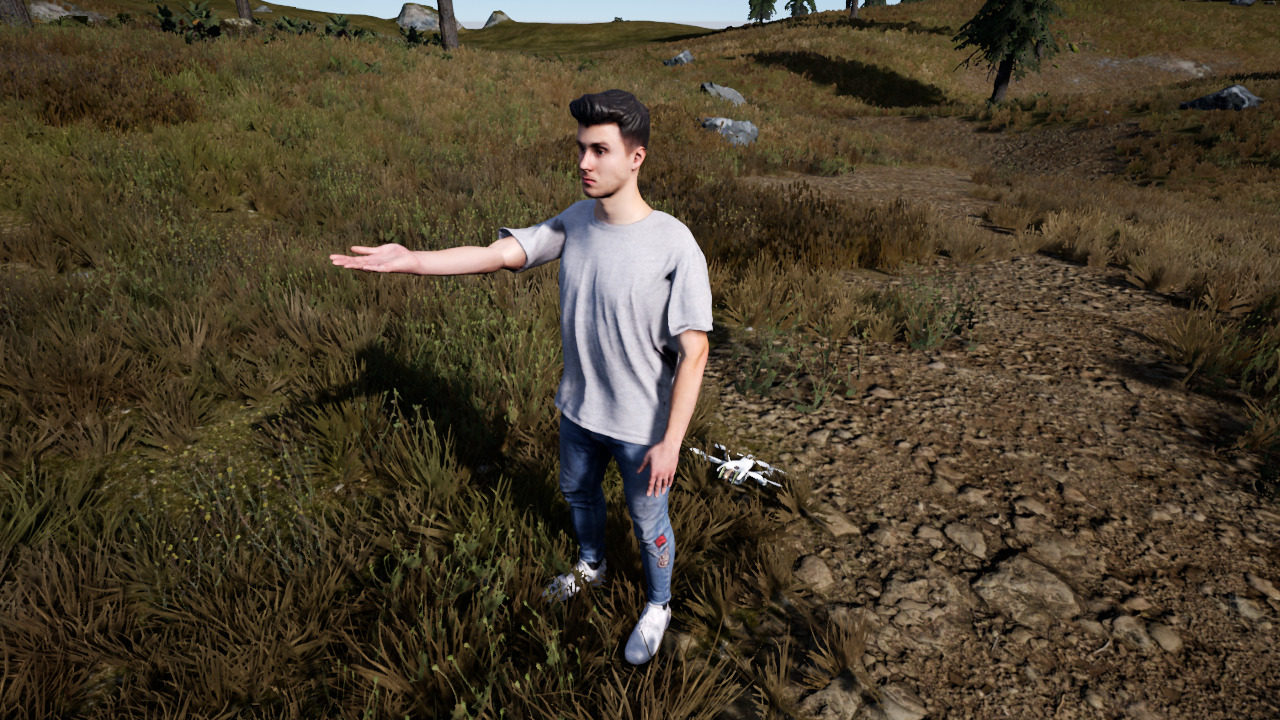
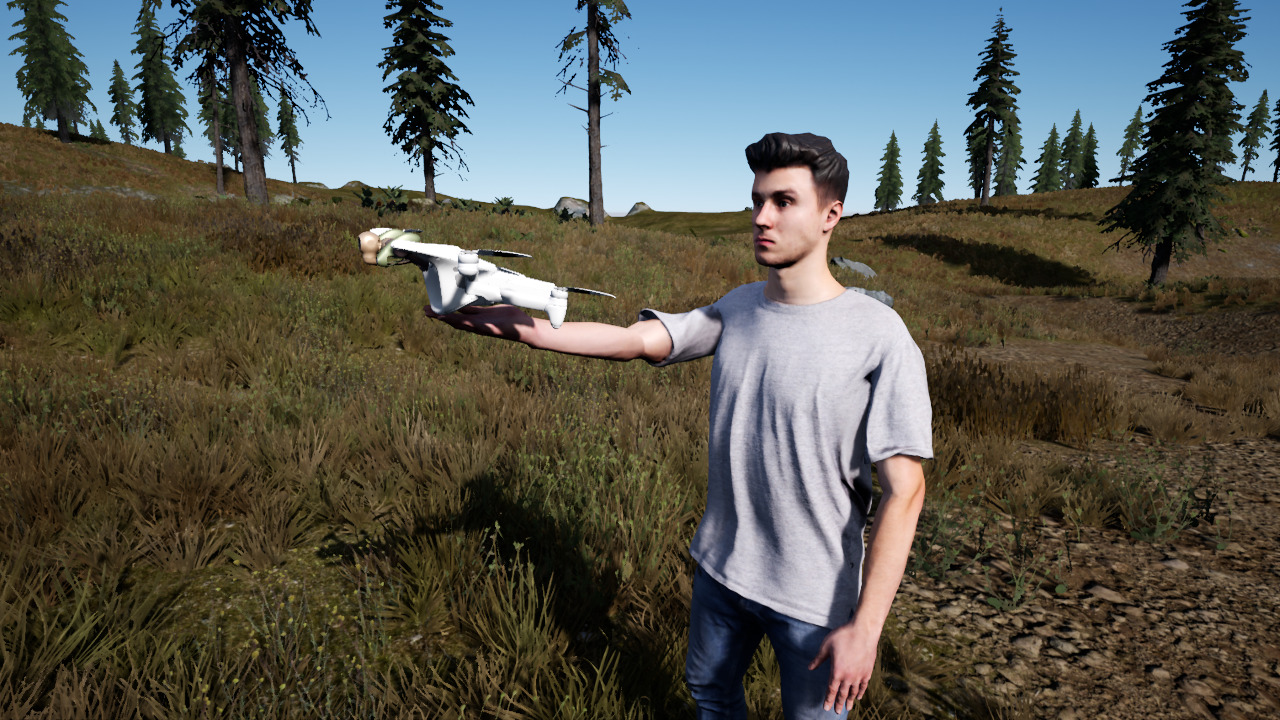
It’s also possible to land on the actor’s hand.
Switching to another pilot at run time#
The pilot that is chosen in the command line can be replaced by another one at run time.
Obviously you need to spawn more than one actor:
$ parrot-ue4-empty -ams-path="DefaultPath,Pickup:*" -ams-path=RunPath,Jasper
A description containing populated paths and their actors should appear once the simulation is launched.
== Paths details ===========================================
Path 'DefaultPath' includes Pickup_0
Path 'RunPath' includes Jasper_0
==============================================================
Now using the Web dashboard (or sphinx-cli), you can set the
current_pilot parameter to change the pilot (or to designate a first one).
Here’s a command line example to set the current_pilot parameter:
$ sphinx-cli param -m world actors current_pilot Jasper_0
Customization of AMS#
You can customize some aspects of the AMS feature by bringing a YAML configuration file to UE4 app’s command line, as follows.
$ parrot-ue4-empty -config-file=</path/to/file.yaml>
Respecting the YAML format, an AMS configuration file could look like that:
Paths:
  - Name: 'MyAwesomePath'
    SplinePoints:
      - 1.85 -9.5 0.4 Walk 15
      - 15.76 -10.10 0.4 Run 20
      - 17.635 0.85 0.4 Stop 5
      - 17.02 12.03 0.4 Run 20
      - 3.03 14.92 0.4 Walk 15
    ClosedLoop: true
Tags:
  - Name: 'MyAwesomeTag'
    FilePath: '/path/to/MyAwesomeTag.png'
    Width : 30
    Height : 25
    OffsetZ : 10
  - Name: 'MyEvenMoreAwesomeTag'
    FilePath: '/path/to/MyEvenMoreAwesomeTag.png'
    Width : 50
    Height : 30
    OffsetX : 10
    OffsetY : 5
    OffsetZ : 20
Two element types can be modified: the paths and the vehicle tags.
Creating custom paths#
As shown in the configuration example, all path definitions belong to the same
dictionary entry Paths. Each path definition must have the following fields:
Name- The name of the path.Make sure that you don’t choose an already existing path name. You can use the command line
-list-pathsto visualize the existing paths.SplinePoints- A list of the different waypoints of the path. Eachwaypoint is a string containing a location [x y z], an optional attitude, and an optional vehicle speed.
The location [x y z] is expressed in Gazebo’s coordinate system. You can use the Unreal app’s report window (key
P) to visualize and retrieve the Gazebo coordinates of any desired point in the world.The optional attitude defines the behavior of the pedestrian beyond the related waypoint. It can be:
Walk: Asks the pedestrian to walk (default value).Run: Asks the pedestrian to run.Stop: Asks the pedestrian to stop for 5 seconds then start walking towards the next waypoint.
The optional vehicle speed defines the new target speed in km/h for vehicles beyond the related waypoint. The default value is 15 km/h. The maximum speed for vehicles is 150 km/h.
Note
The proportional-integral-derivative controller (PID controller) used to control the vehicle speed is configured to converge relatively fast. Therefore, it is recommended to limit the speed variation between two successive waypoints.
ClosedLoop- A boolean that defines whether the path is a closed loopor not.
To use the custom path given in the example above, just do like with the predefined paths:
$ parrot-ue4-empty -config-file=</path/to/file.yaml> -ams-path=MyAwesomePath,Jasper